Main content
CEB service


CEB service

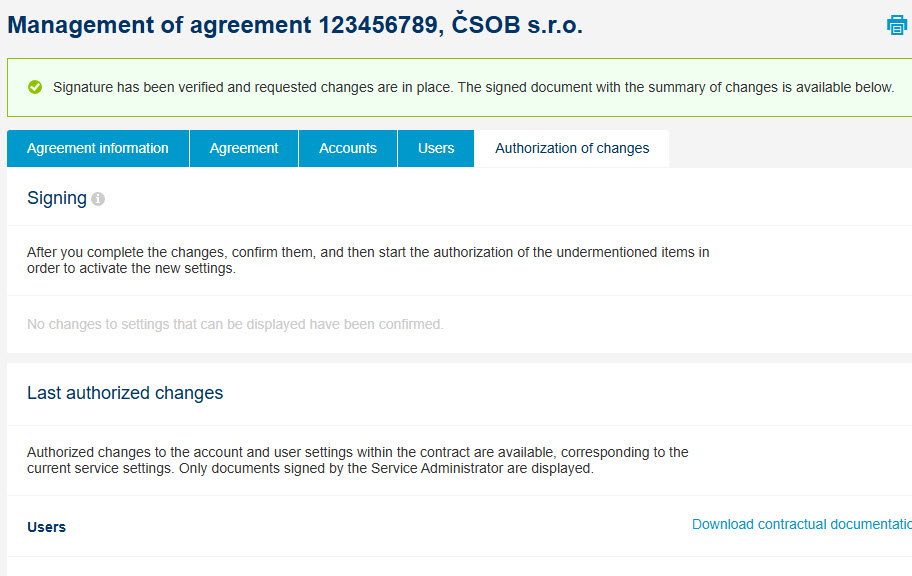
CEB service setup: user rights and roles
-
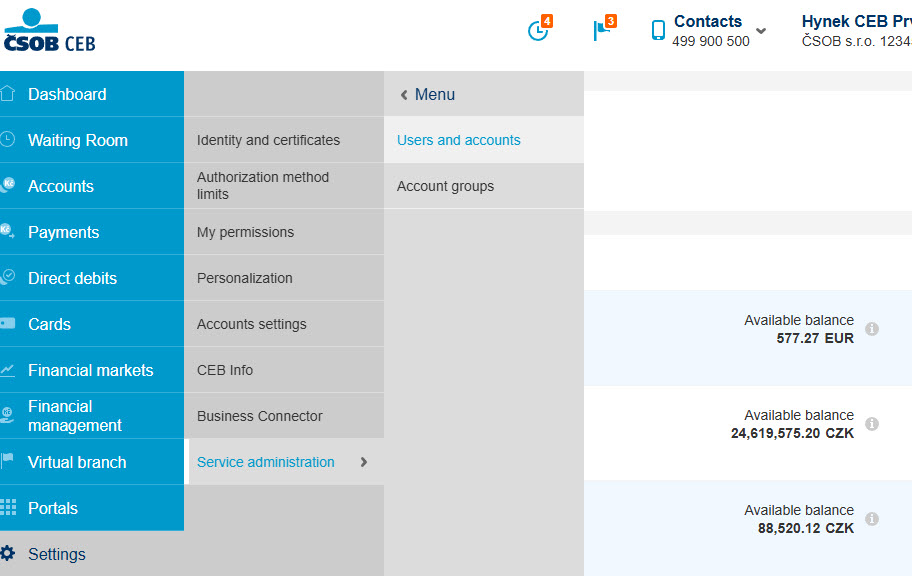
To add a new user, setup accounts, change limits and even more can be done in the Service administration - choose Settings in the menu and then Service administration and Users and accounts.
-
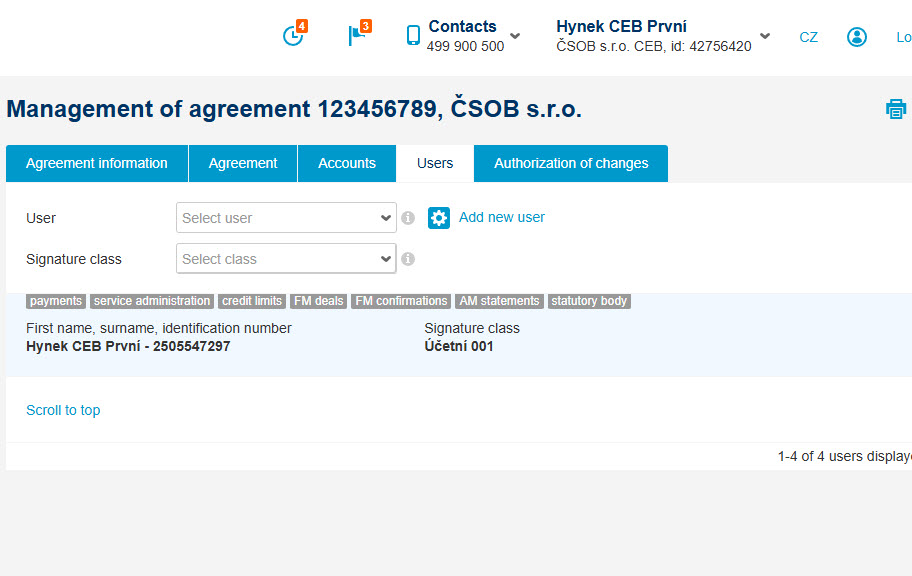
Say you have a new accountant in the company and he/she is to work with the accounts, choose the Users tab and link to Add new user.
-
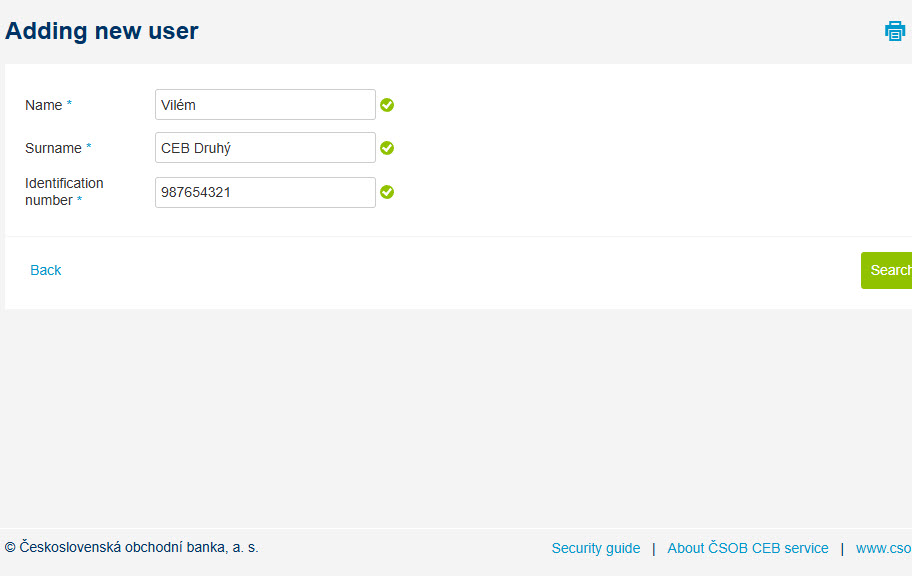
User to be added need to have ČSOB Identity setup and you will need to know his/her name, surname and ČSOB Identity number, provided in the contract with the bank (it can be also found in user profile in e.g. Smart application). After filling in these data you can Search for user.
-
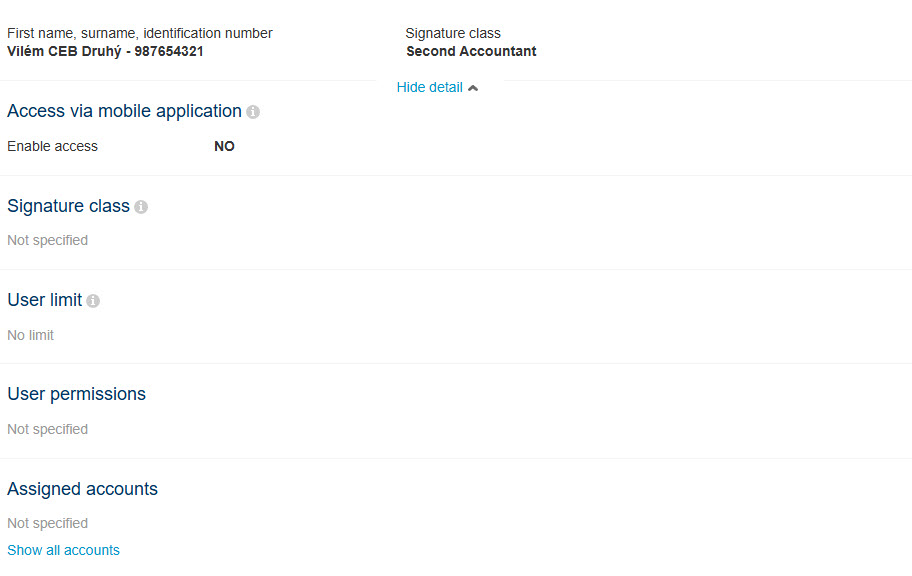
After adding a new user, complete also user rights in the service: signing rights, limits, roles etc.
-
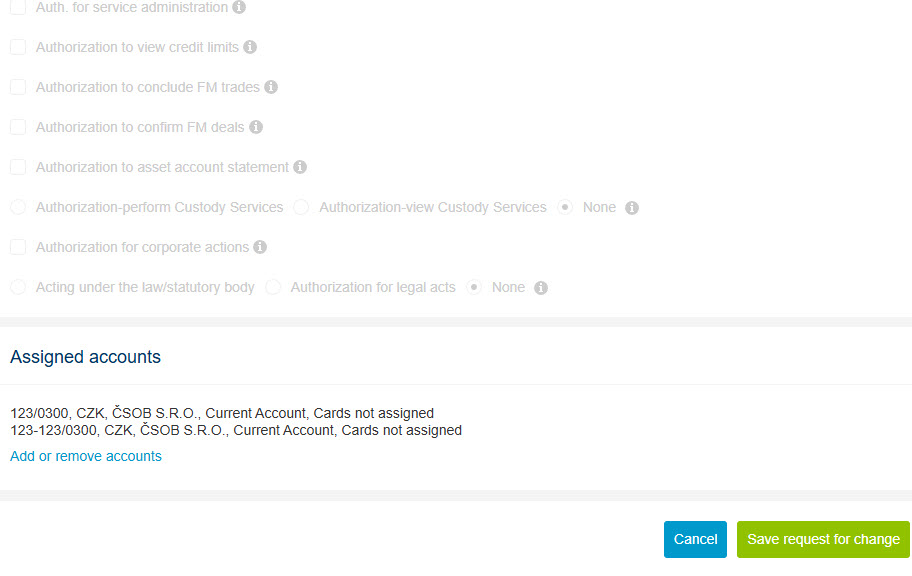
Do not forget to add accounts new user should have available. Save request for change to continue.
-
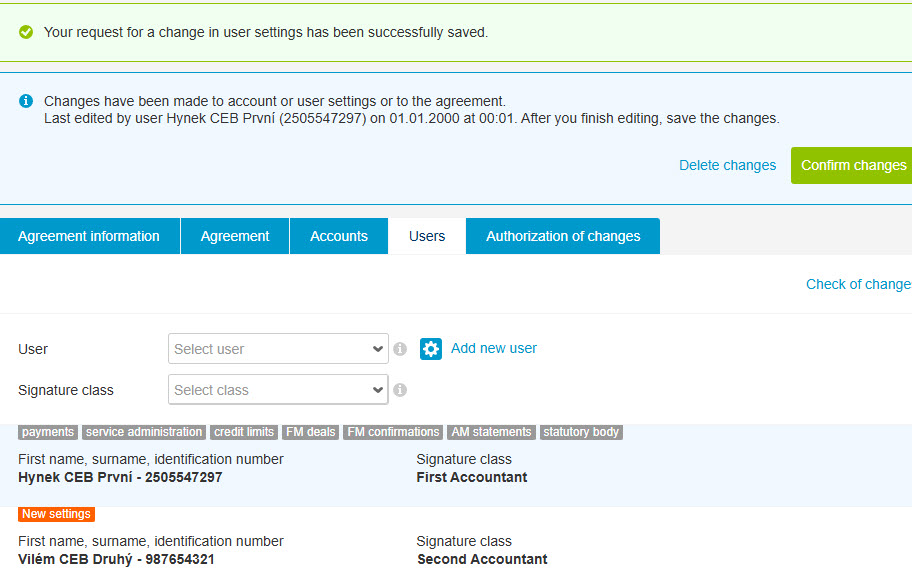
Everything done? Confirm changes and the service will generate a new contract documentation.
-
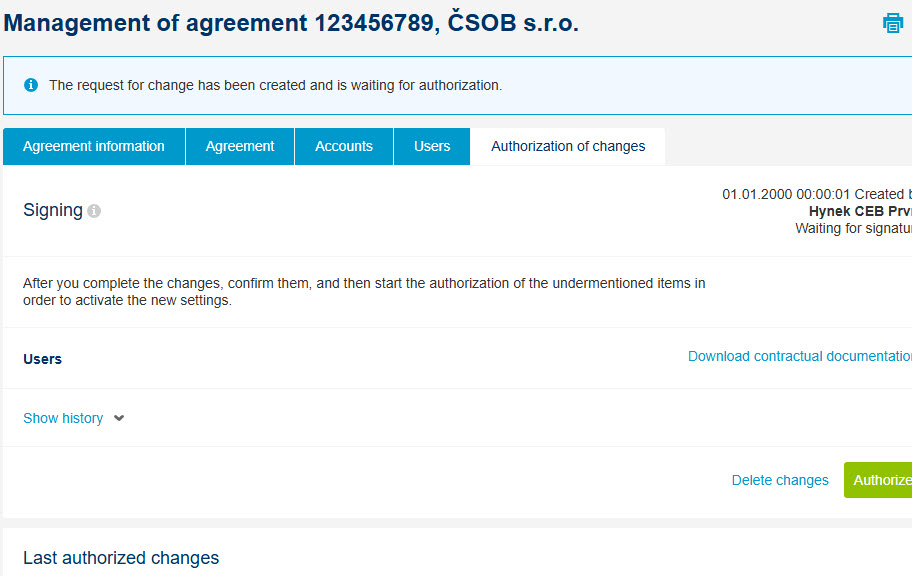
Check the changes in the documentation, and you can Authorize the documents with a Smart key or chip card.
-
If you are the only one to authorize, the changes will immediately come into effect and the new user can log on and start using the service.
CEB service setup: account configuration
-
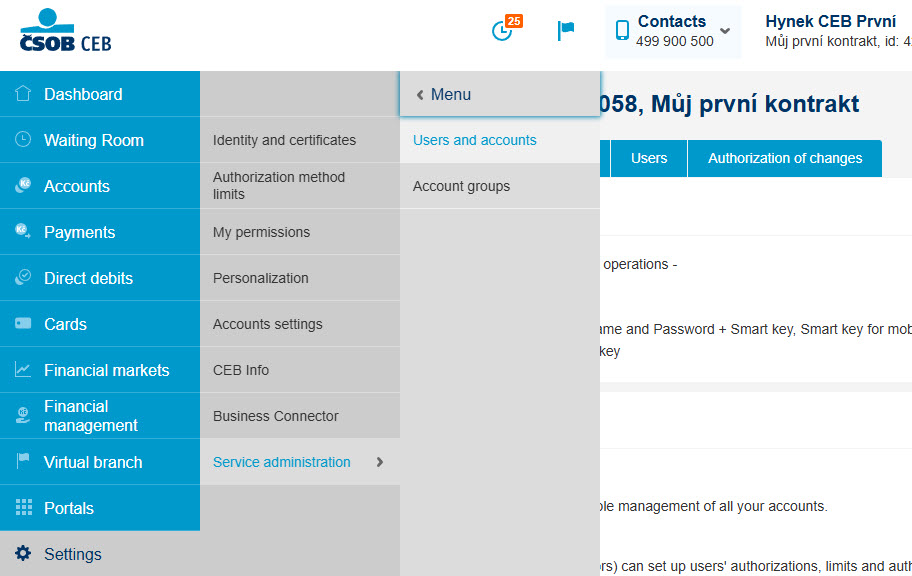
Add a new user, a new account, change limits and other setup can be done in the Settings menu – just go for Service administration, Users and accounts.
-
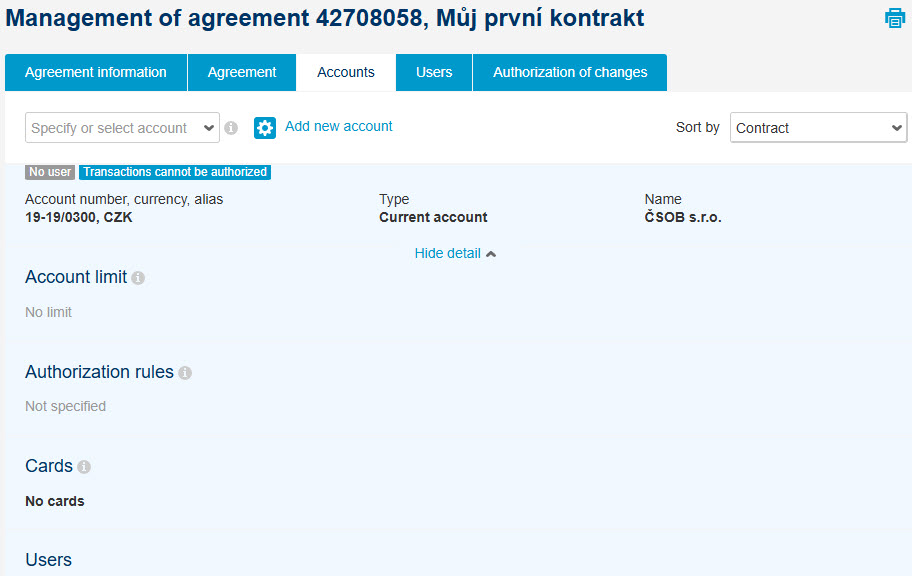
Say you have contracted a new account and want to add it to the service – head for Accounts tab and Add new account.
-
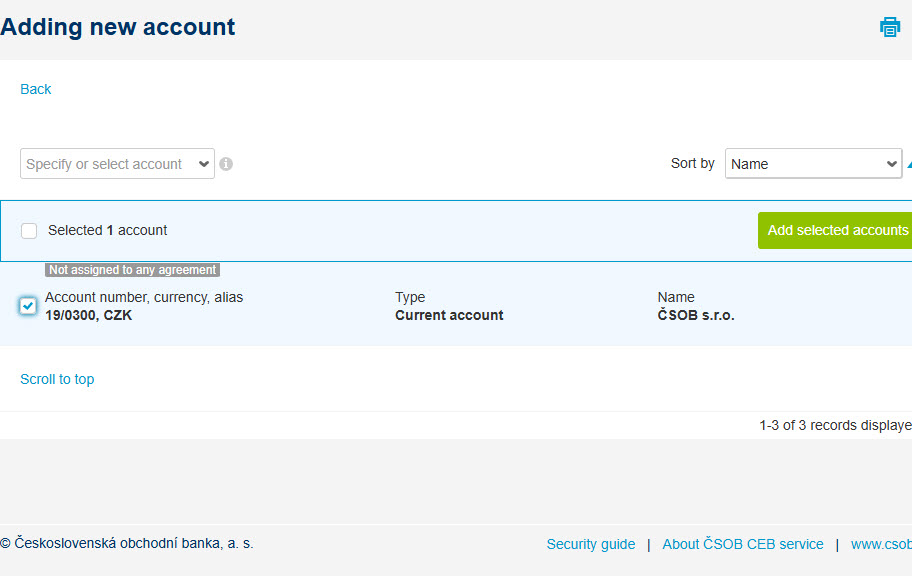
Accounts held for your company or accounts that your company has power of attorney for will be shown. Choose the right one and Add selected accounts.
-
Edit the account settings in order to define authorization rules, set limits or add users that will see it in the service.
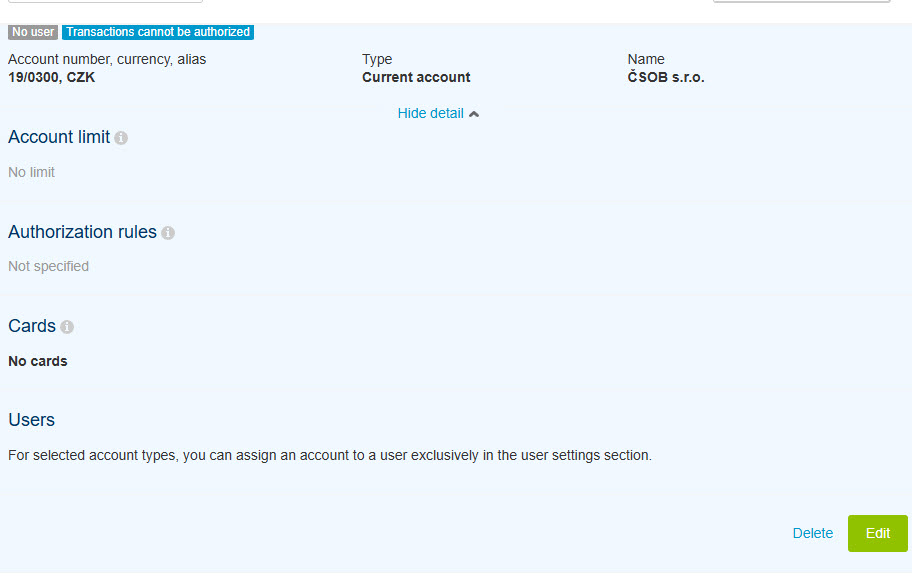
-
Authorization rules define users that can authorize transactions up to defined limit. Add or remove user will take you to screen for adding users.
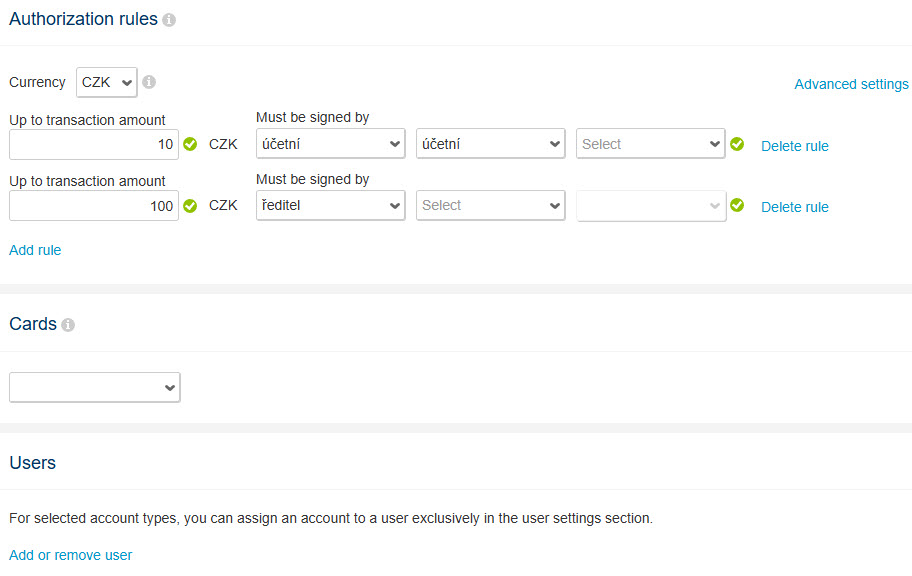
-
Choose the users to have access to the account, confirm by Add selected and go Back to account settings.
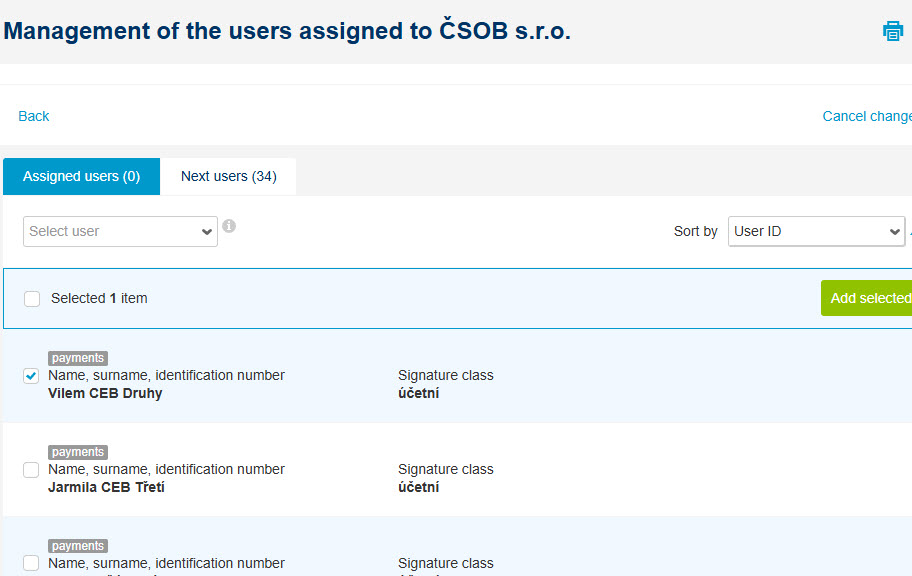
-
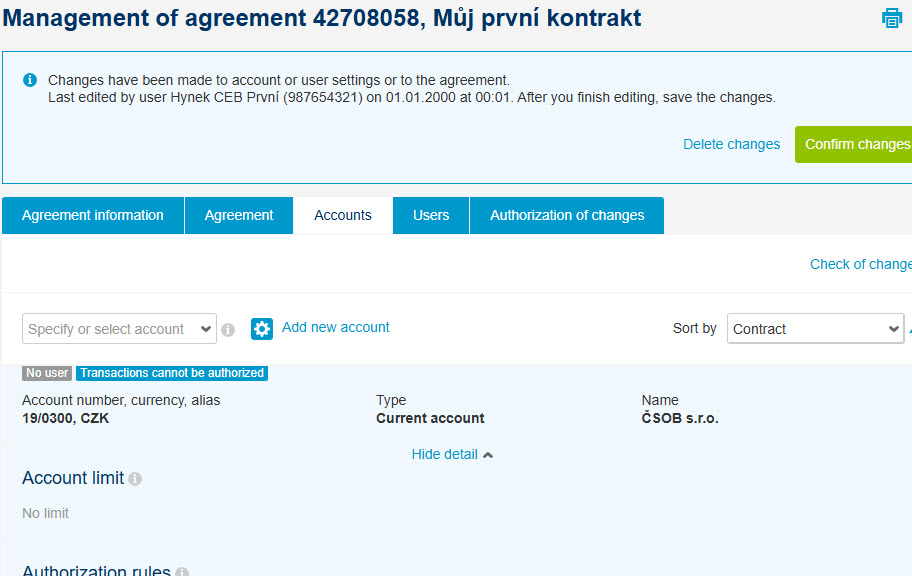
Done with this account setup? Save request for change.
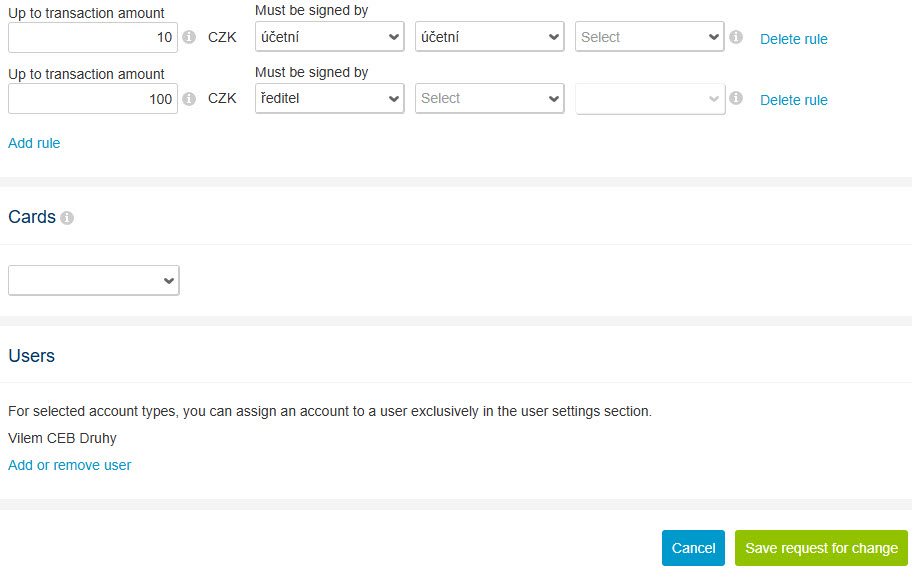
-
You can setup also other accounts, when done, Confirm changes and the CEB service will generate a new contract documentation for you.
-
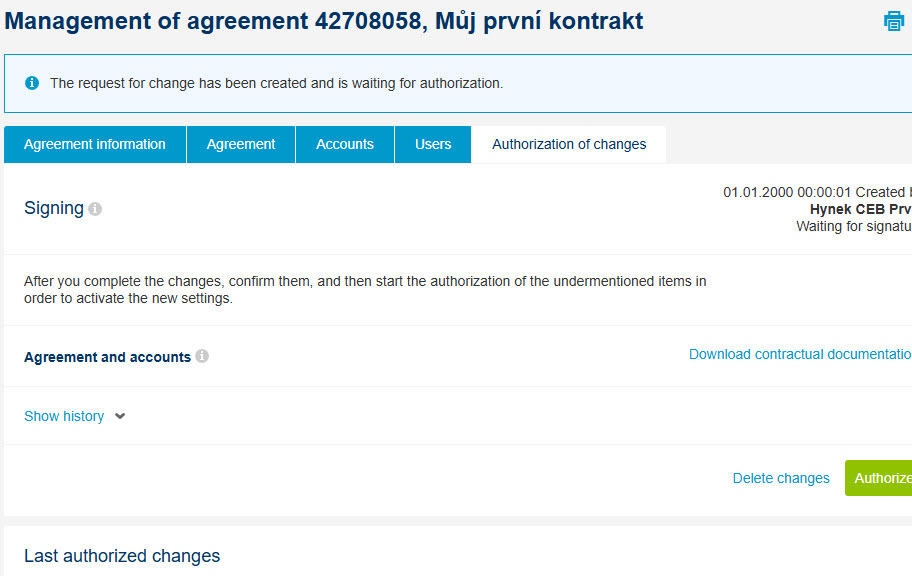
Check the documents and their content, if everything is as required, Authorize changes.
-
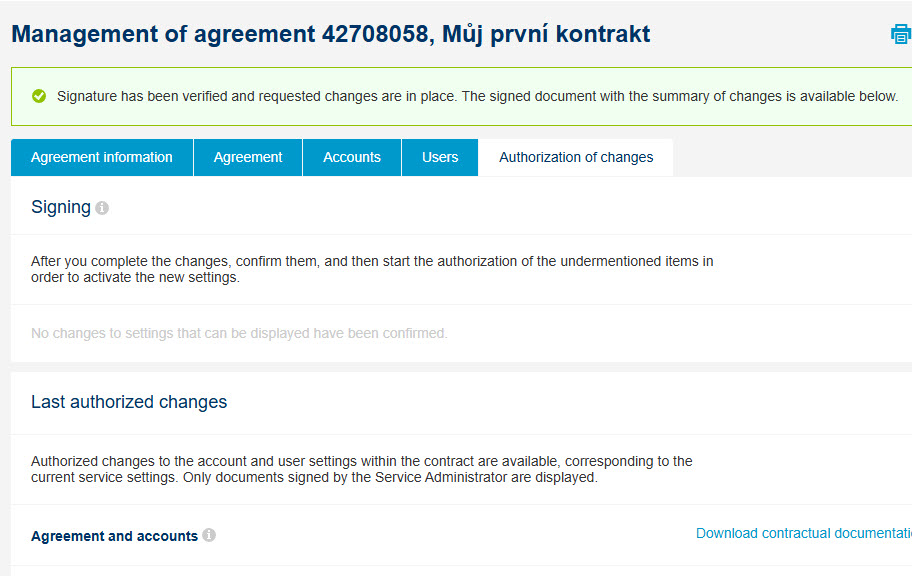
Wait for signing process to finish and everything is ready – you can start working with the newly added account right away.
Setting up statements in the CEB service
-
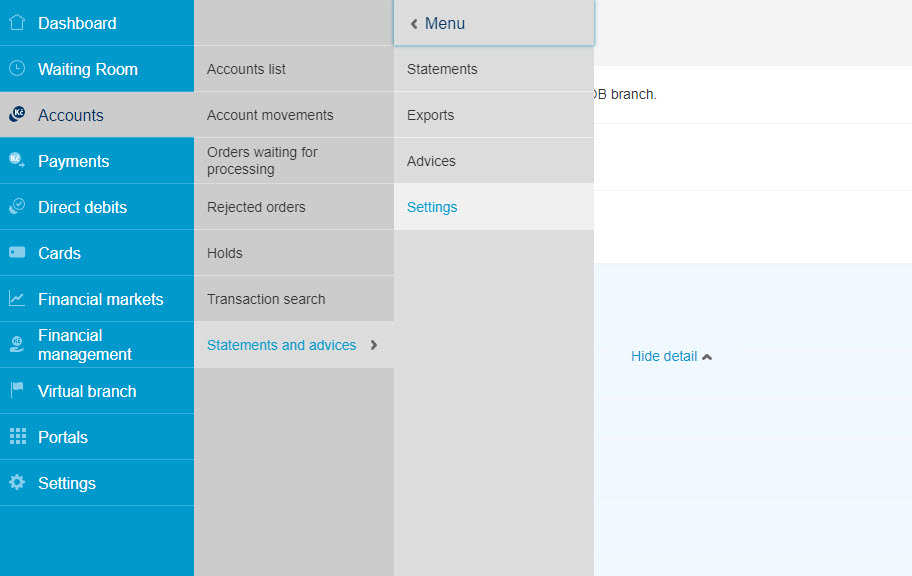
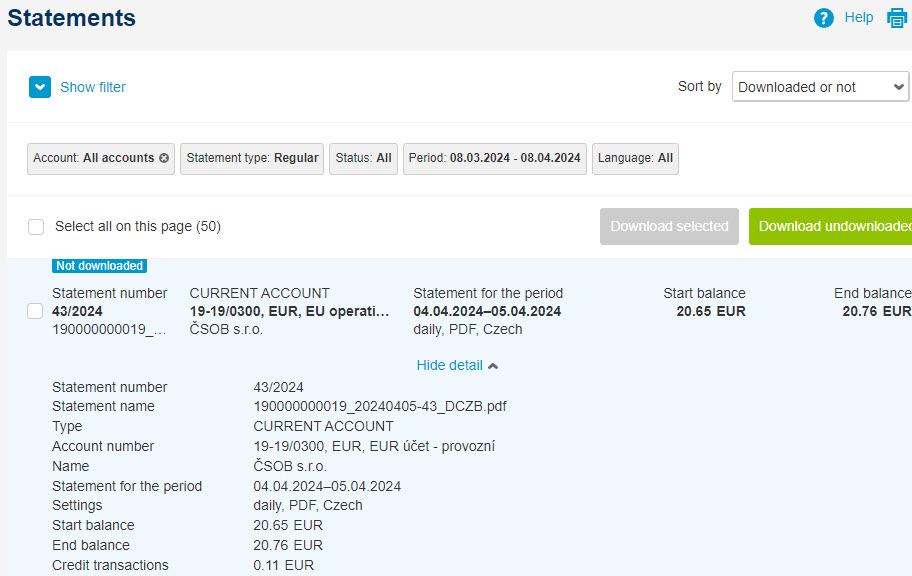
Set up or check your electronic statement settings easily in the CEB service. Select Accounts,
Statements and advices, Settings in the main menu.
-
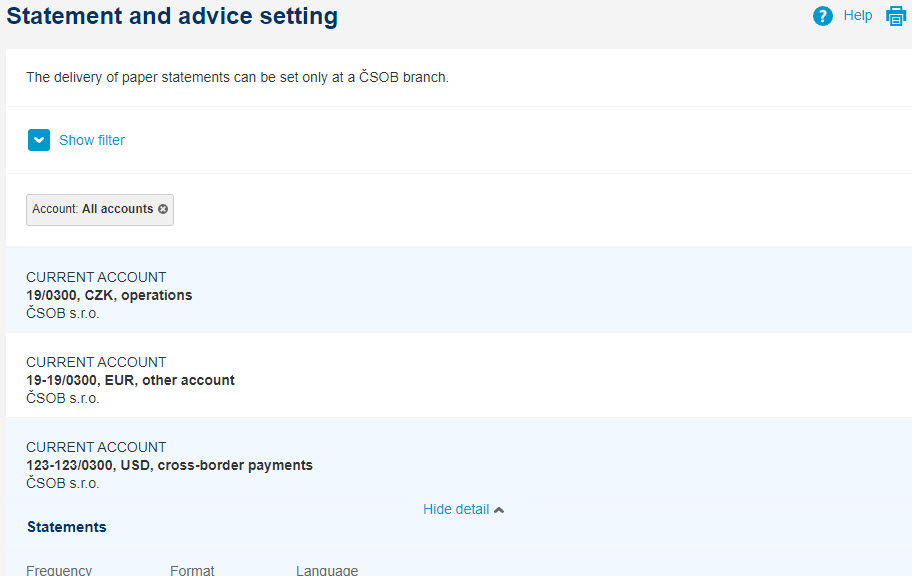
In the account overview, select the account you want to set up – you can set up multiple statement types
as well as various combinations (e.g. multiple frequencies).
-
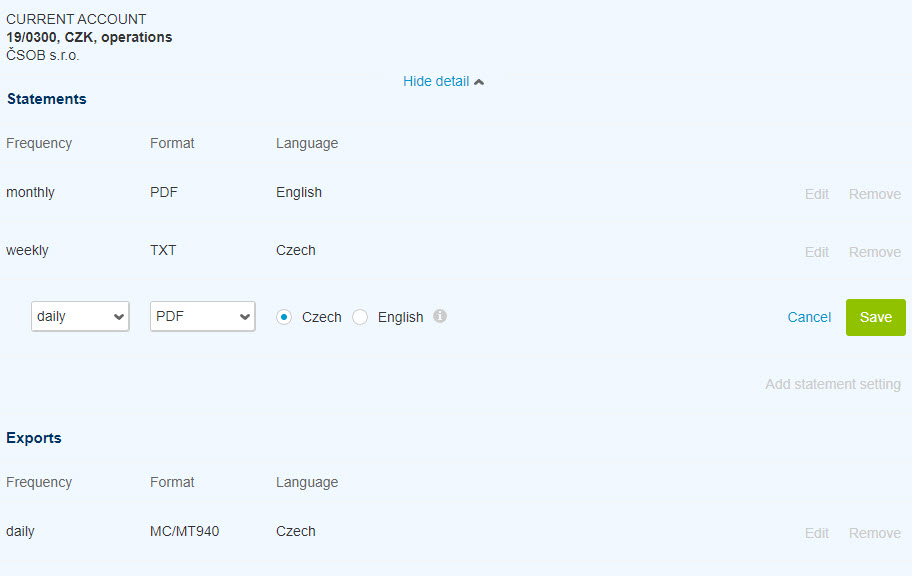
Set up human-readable Statements – select the frequency (daily, weekly, monthly), format (PDF or
text) and the language used in the statement template. Then simply Save the settings.
-
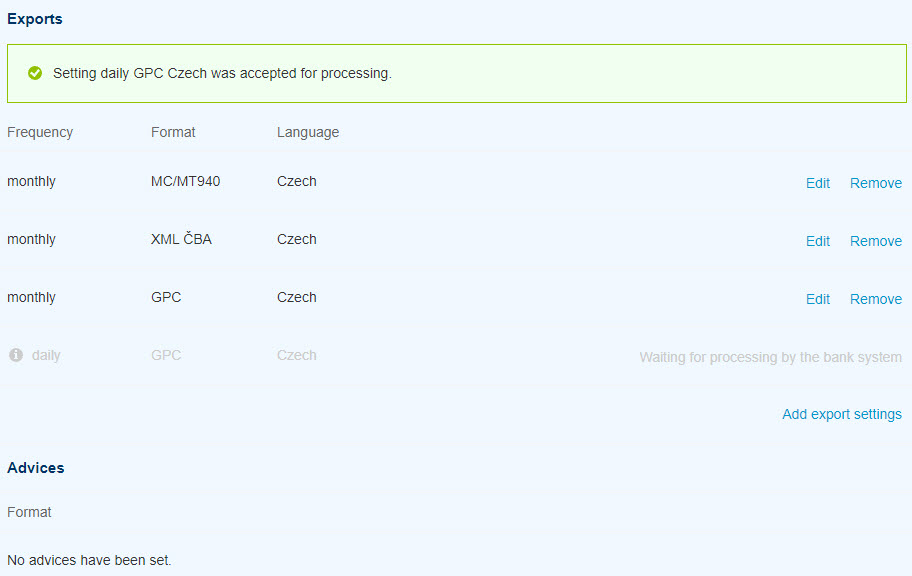
The service also offers Data statements, which are intended for processing in accounting
software. Again, you will set up the frequency, format (e.g. GPC – format specifications are
available on the service website) and the language applied to the selected data fields.
-
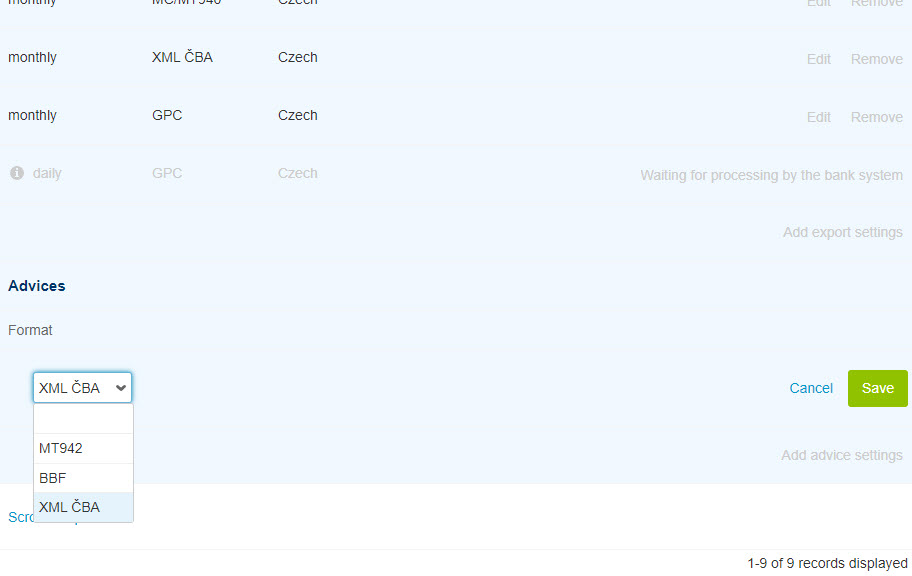
Data Advices are used for automatic processing of data during the day and for even faster
accounting. Again, multiple formats are available. Select the one your accounting software supports.
-
After confirming the settings, you'll find statements for the next period in this menu. For automated
downloads, please refer to the Business
Connector service.
Notifications in the CEB service
-
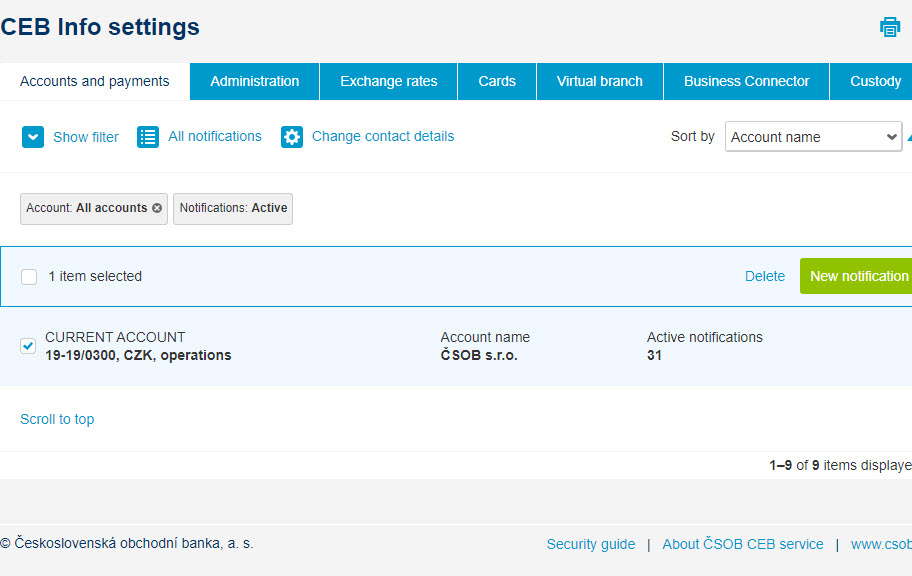
You don't have to be online, but you can still have all the important information. Simply set up
notifications – do it in the Settings, CEB Info menu. Notifications may concern various products
– you can set New notification e.g. for accounts.
-
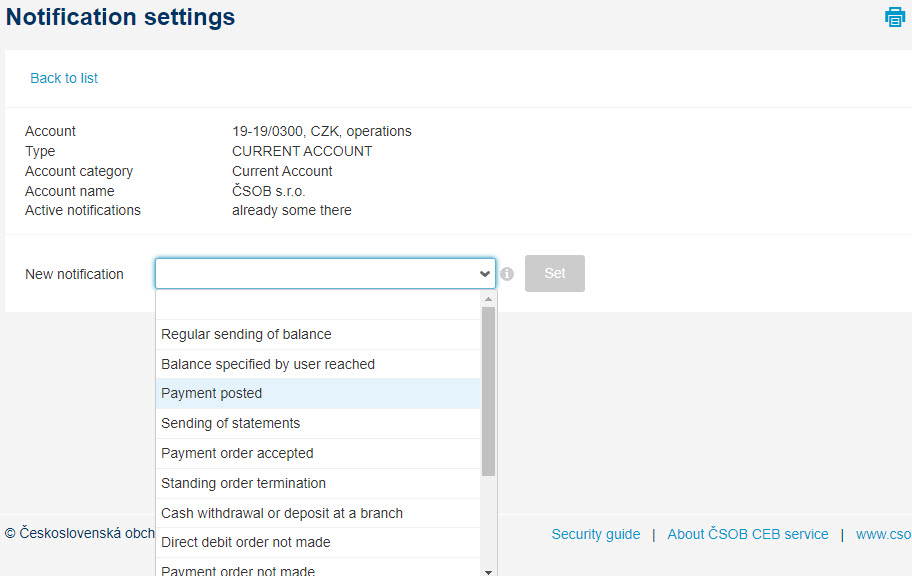
After selecting the account, select the desired notification type and press the Set button again.
-
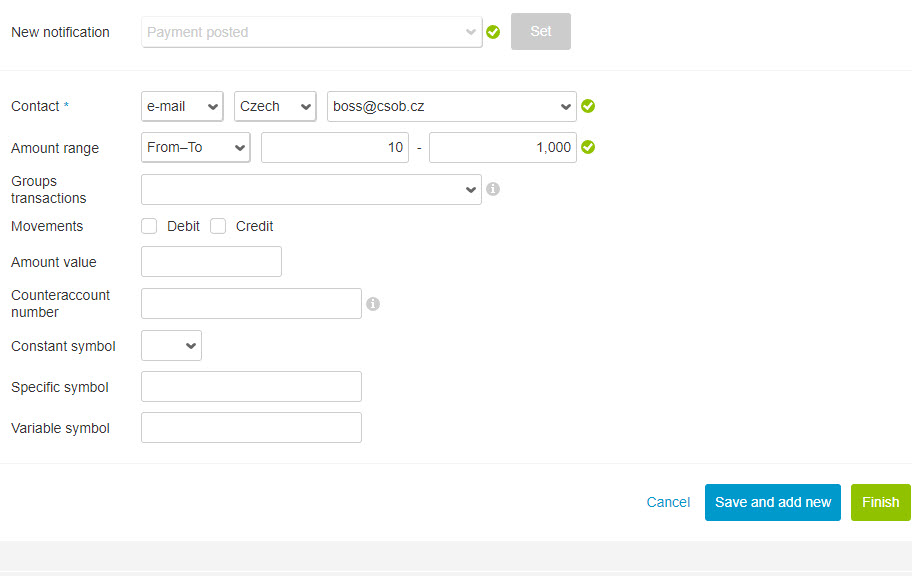
You can select how you want to receive notifications (email, SMS or CEB Mobile push
message). Enter your contact details and, optionally, other limiting conditions such as amount.
You can save multiple notifications of a given type, or press the Finish button.
-
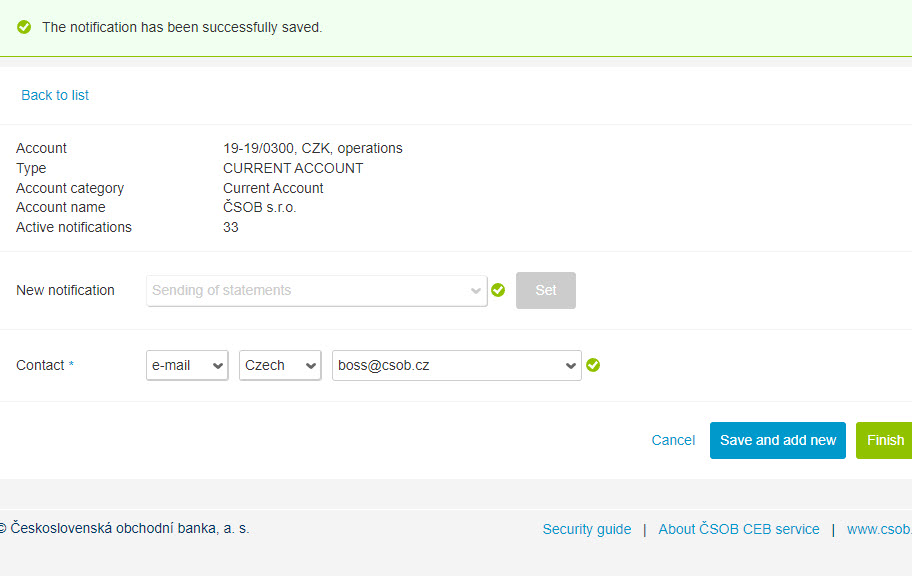
The notification has been saved, and you can set up another one – e.g. automatic sending of statements
by email. Add email address and press the Finish button.
-
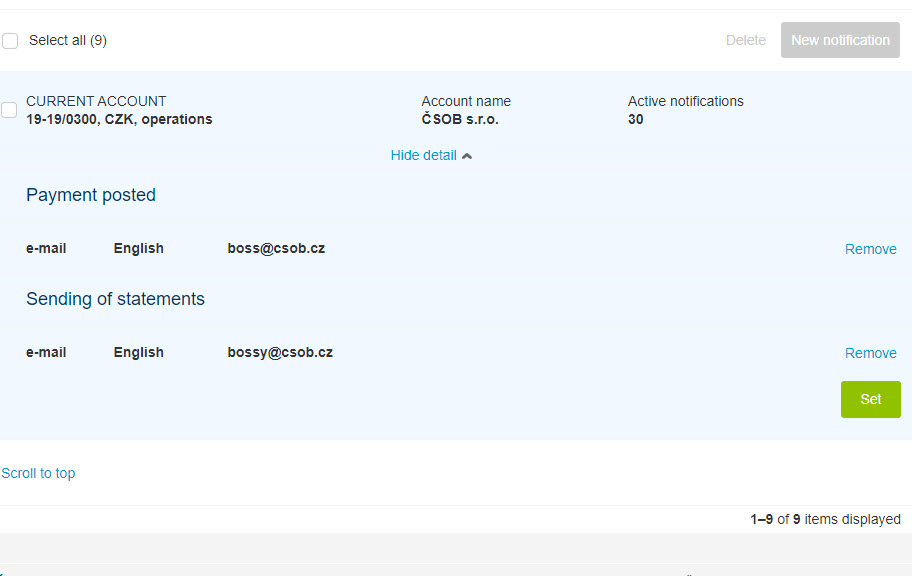
If you don't want to create another notification for this account, go Back to list.
-
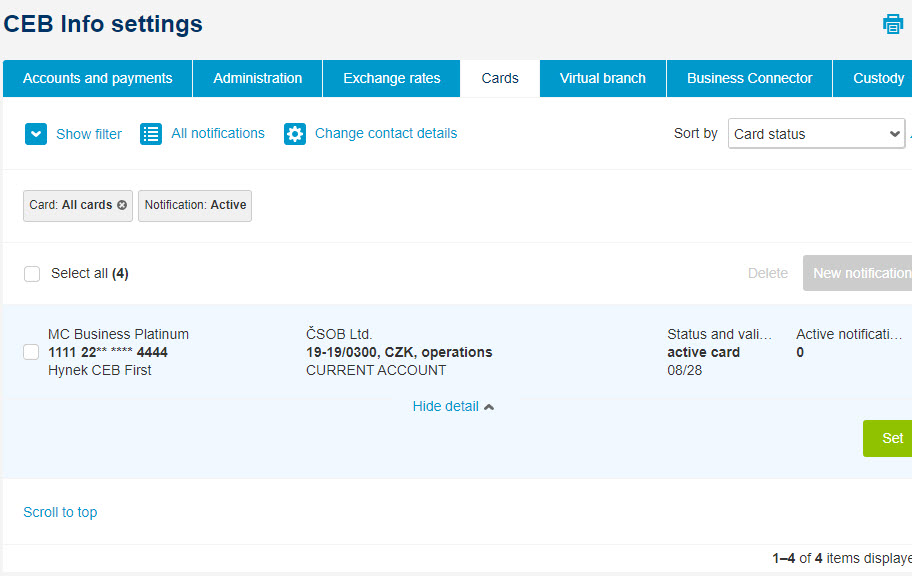
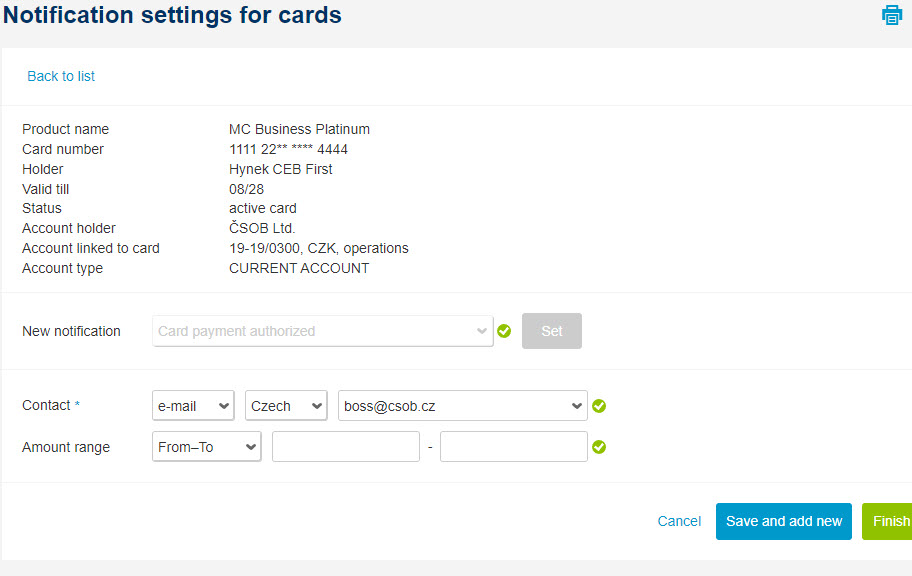
Notifications for payment Cards may be useful too.
-
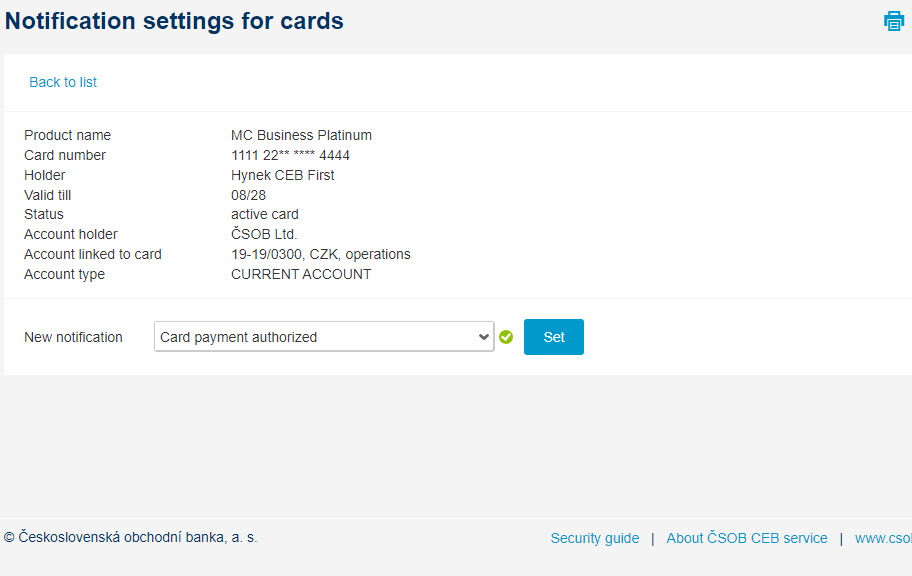
You can be notified e.g. of a transaction authorization – i.e. when your payment card has been used
(excluding the offline mode) – just Set one such.
-
Specify the notification method, your email address (if necessary); you can limit the notification
depending on the amount or be notified of any transaction. Confirm your selection by pressing the
Finish button and then go Back to list.
-
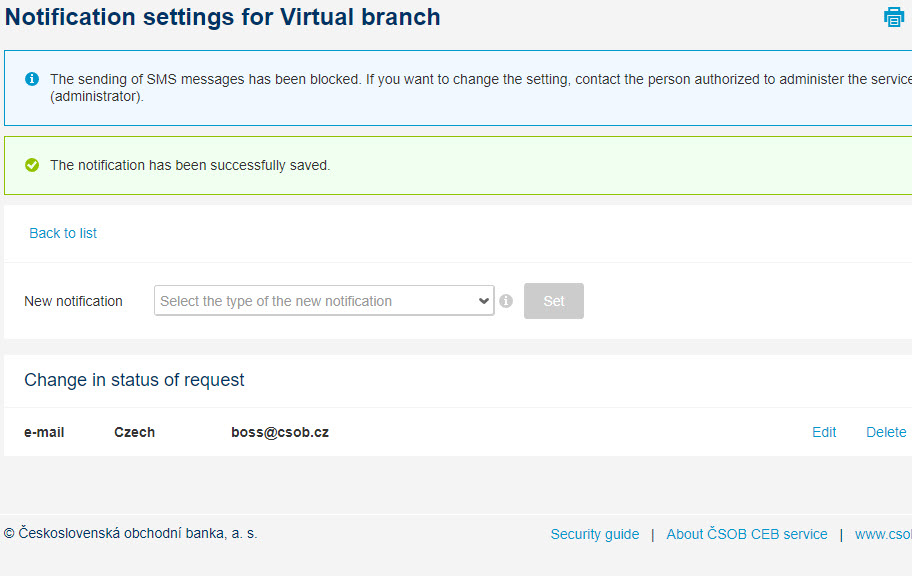
Virtual branch notifications may also be useful. You can be notified whenever the status of a
request changes – typically when the bank processes your request.

-
The notification has been created, and you can go Back to list.
-
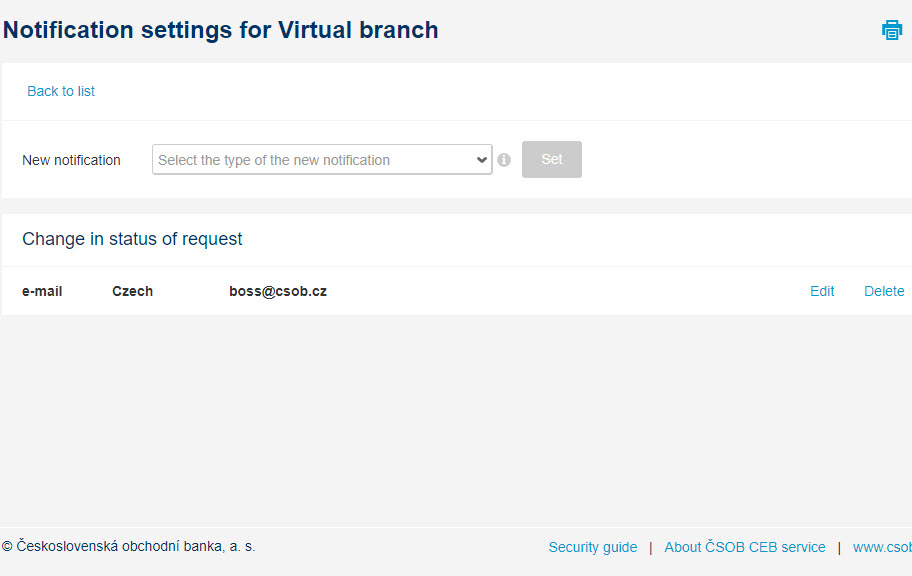
There are multiple notifications the service offers, and you can also create the same notification for
multiple recipients (e.g. you can send statements to multiple addresses). Apart from that, you can set
up notifications for the Business Connector service, have the Exchange rates sent to you,
or get notifications related to changes in your agreement settings (Administration).
Confirmation of account maintenance or balance
-
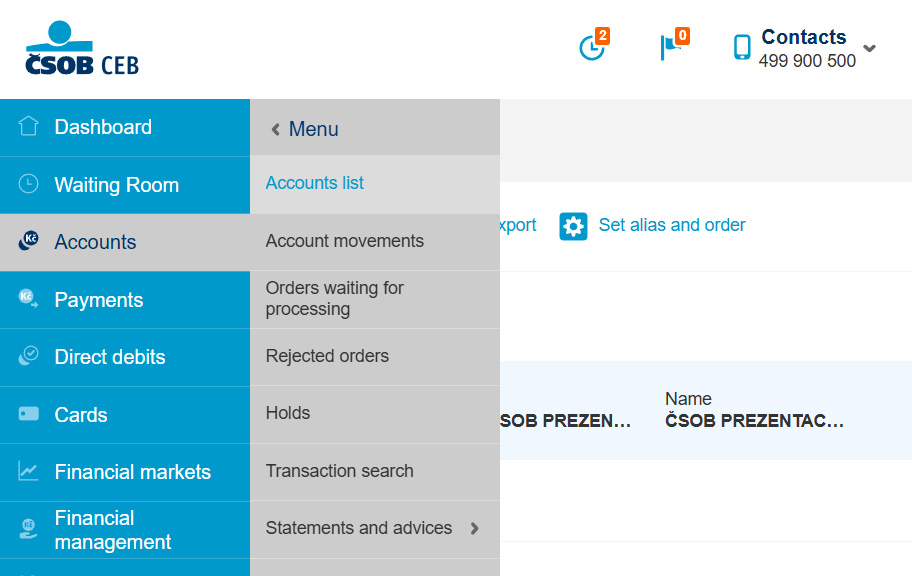
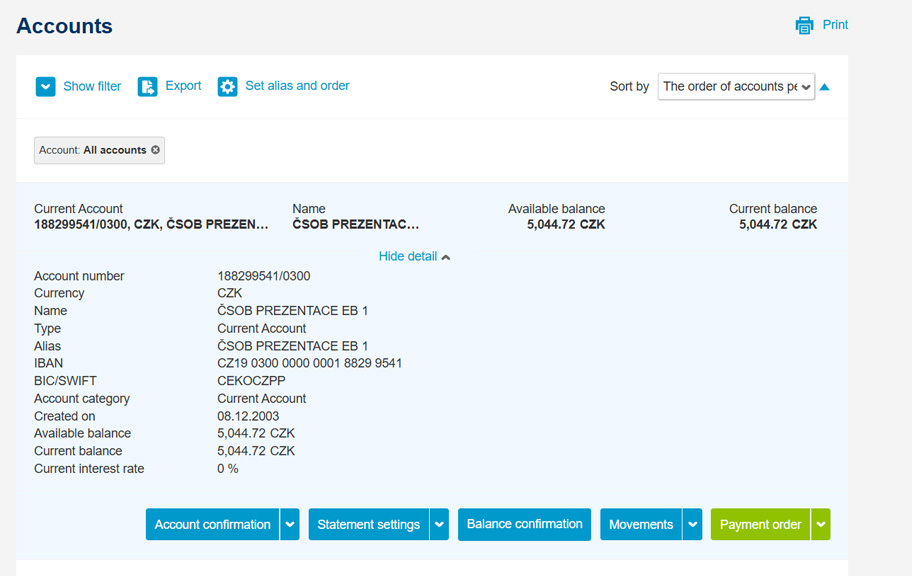
You can easily download both the Account Maintenance Confirmation and the Account Balance Confirmation on the desired date from the CEB. The quickest way is via the main Accounts menu to the Account Overview item.
-
If you have multiple accounts, select the line of an account for which you need confirmation. When you click on the selected account line, you will see both the Account confirmation and Balance confirmation buttons in action buttons.
-
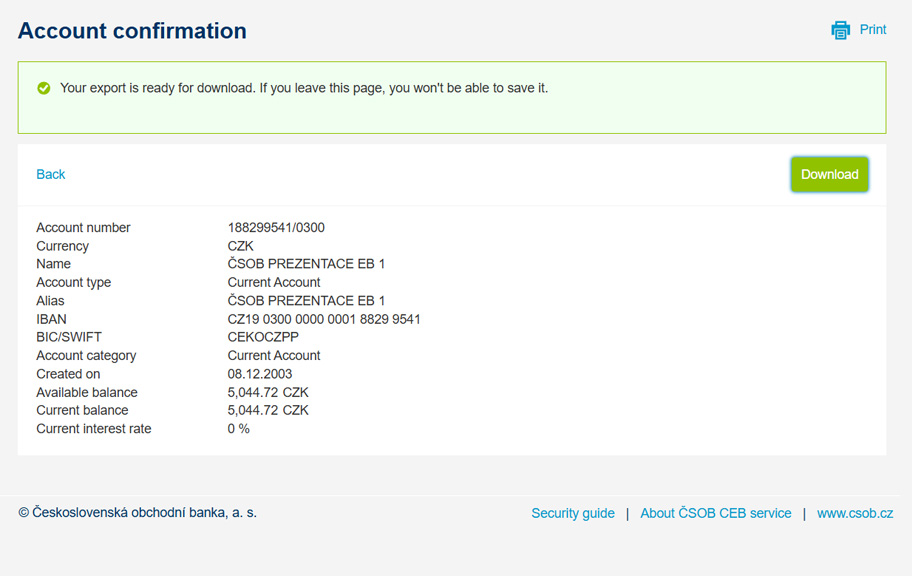
The Account confirmation will be generated immediately for you to download it in PDF format. You do not need to fill in any other details. The file will be saved in your Downloads folder.
-
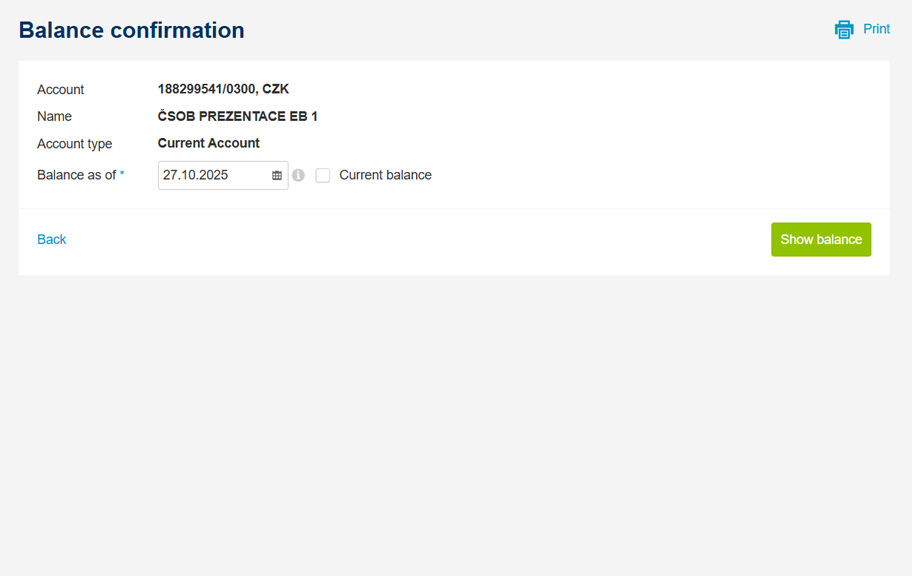
To confirm the balance, you can choose whether you want to confirm the current balance or the balance as of a specific date.
-
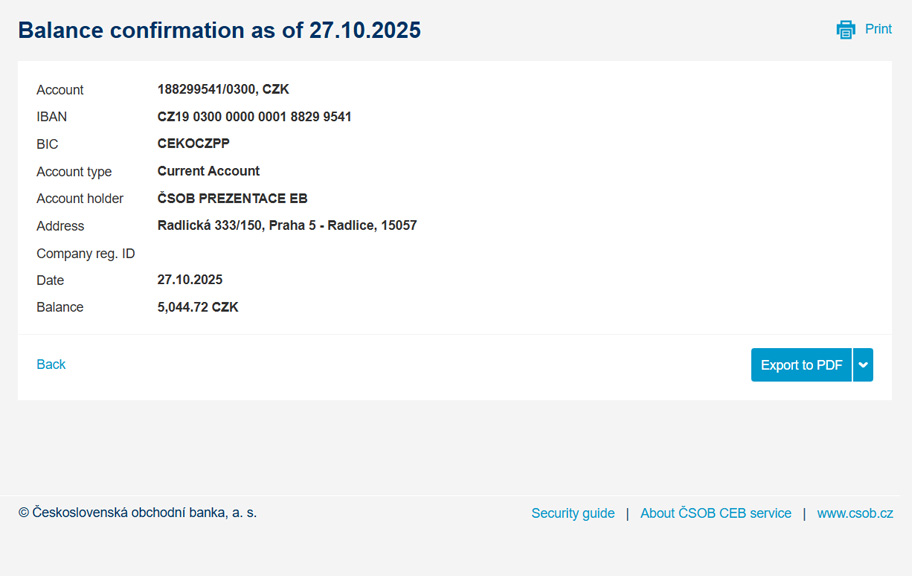
A PDF confirmation will be generated, which you can again download to your folders.
Transfer from current account to savings account
-
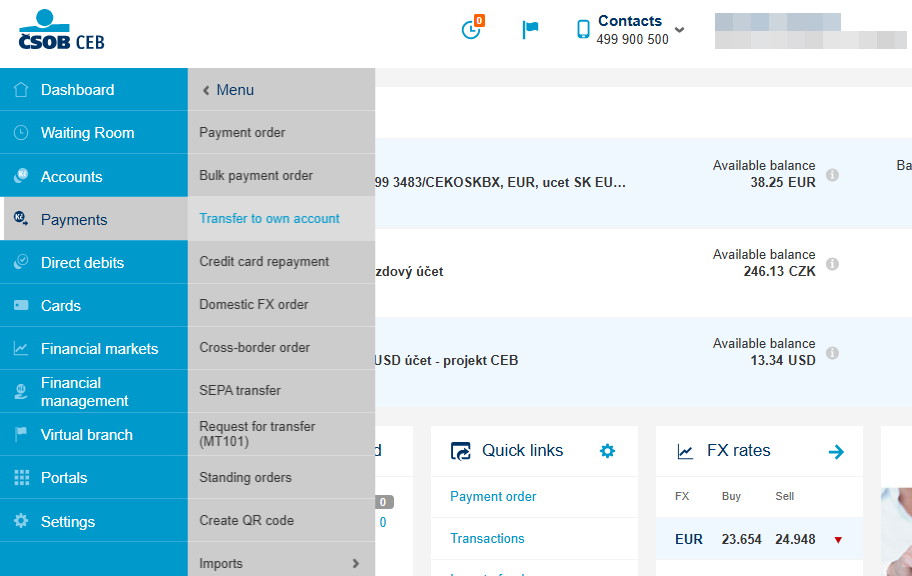
CEB allows you to easily transfer funds between your accounts, for example from your current account to your savings account. The transfer can be done in a few simple steps. In the menu, select Payments, Transfer to own account.
-
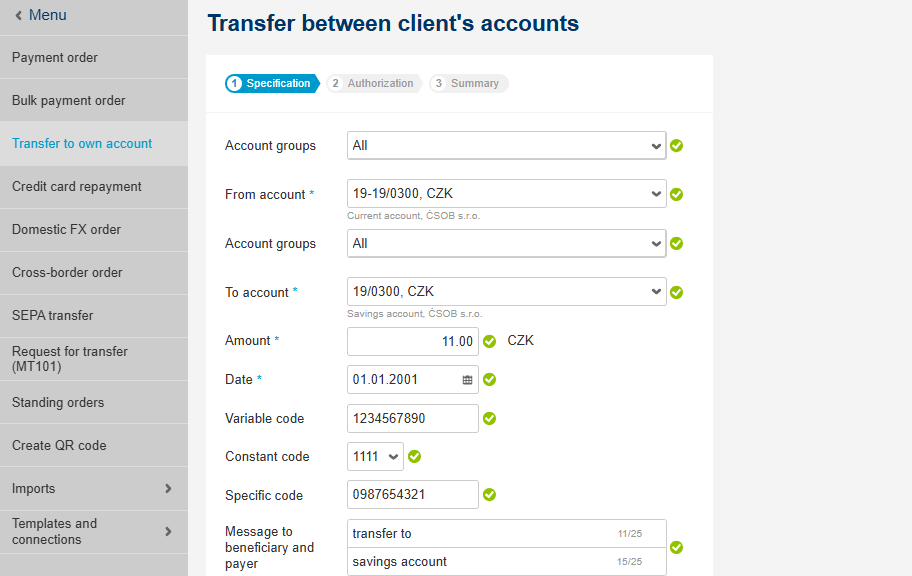
Select the source account from which you want to send the money, i.e. your current account. In the To Account field, select your savings account as the destination account for the transfer. Enter the amount you want to transfer to your savings account. Make sure the amount does not exceed the current balance in your checking account.
-
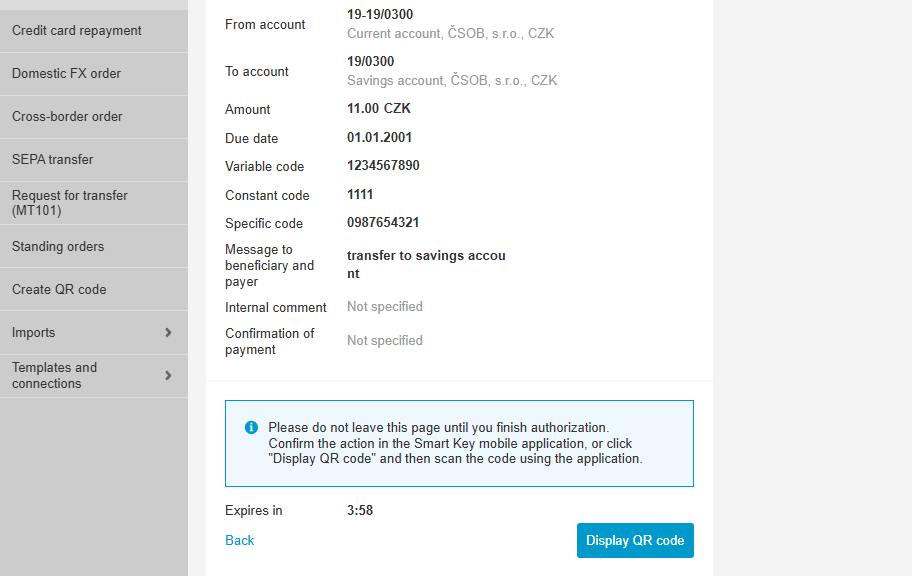
Check all the details entered and confirm the transaction by authorizing it with a Smart key or QR code. Once the authorization is correct, the transfer is completed.
CEB service setup: authorization rules
-
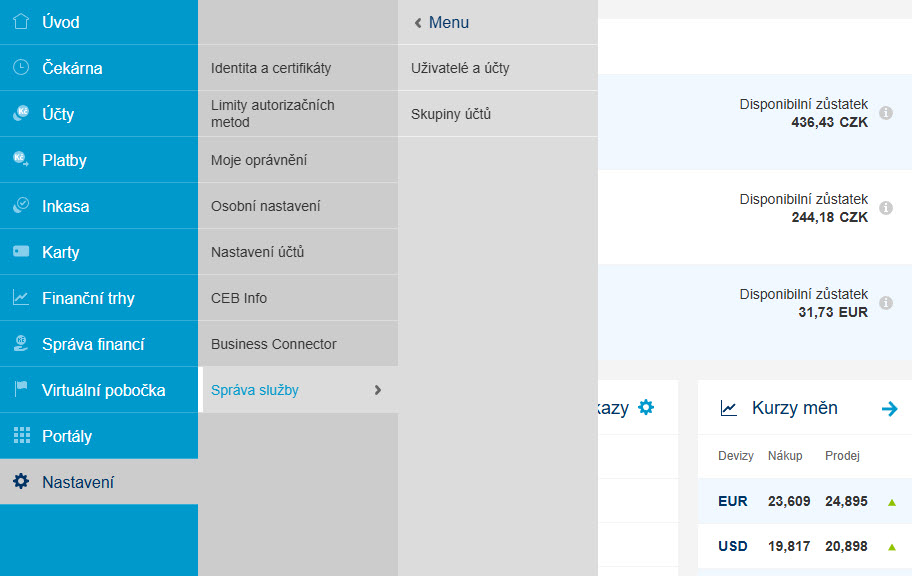
Changing authorization rules and related limits on your account can be performed in the Service administration. Head for Settings, Service administration and User and accounts option in the menu.
-
Need to change entitlement to sign transactions or limits? All can be found in the Accounts tab.
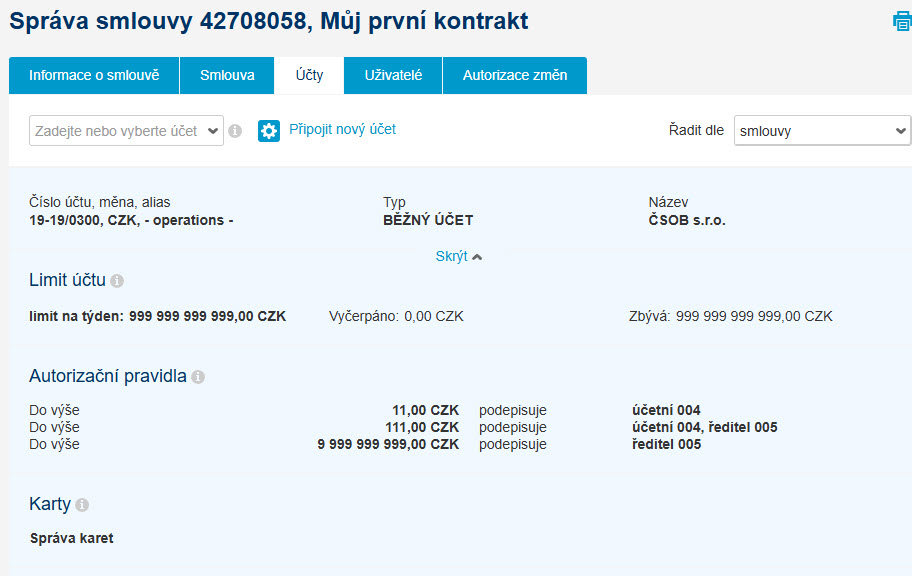
-
Choose the account you wish to modify and click on Edit.
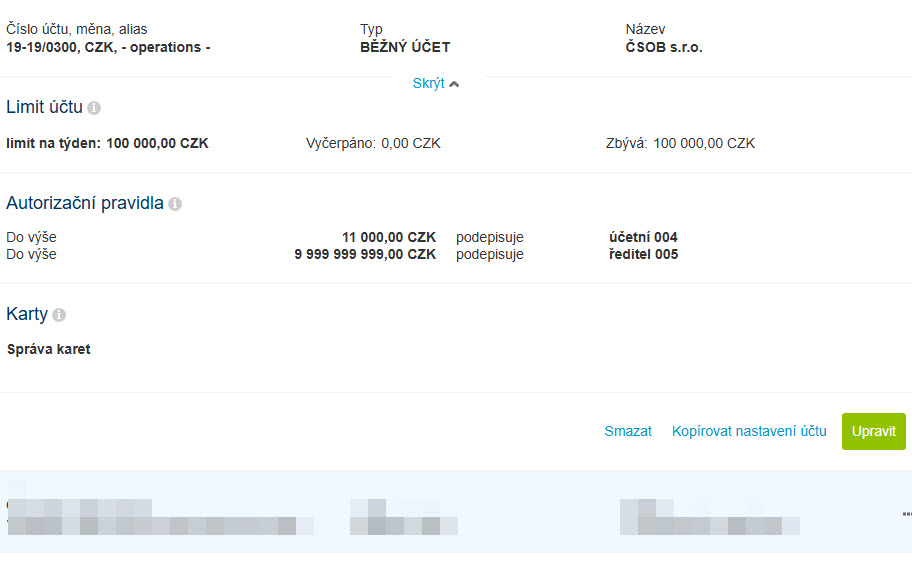
-
Set the limit per period and authorization rules – i.e. up to what limit can what users sign a transaction and Save this proposal. In the CEB Plus service you can set a combination of up to 3 users (signatures classes) or use advanced settings of authorization rules.
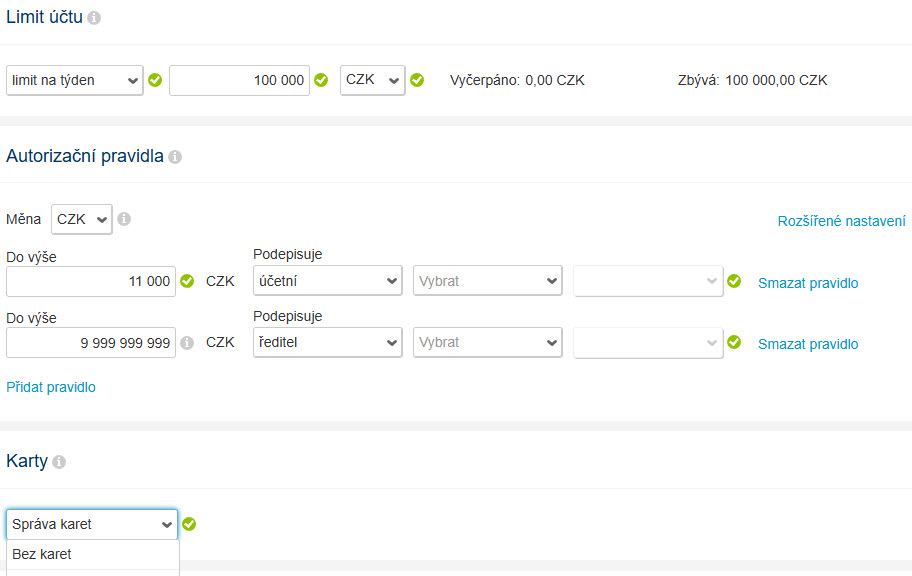
-
You can set up more accounts or just Confirm changes in order for the service to prepare you updated documentation for authorization.
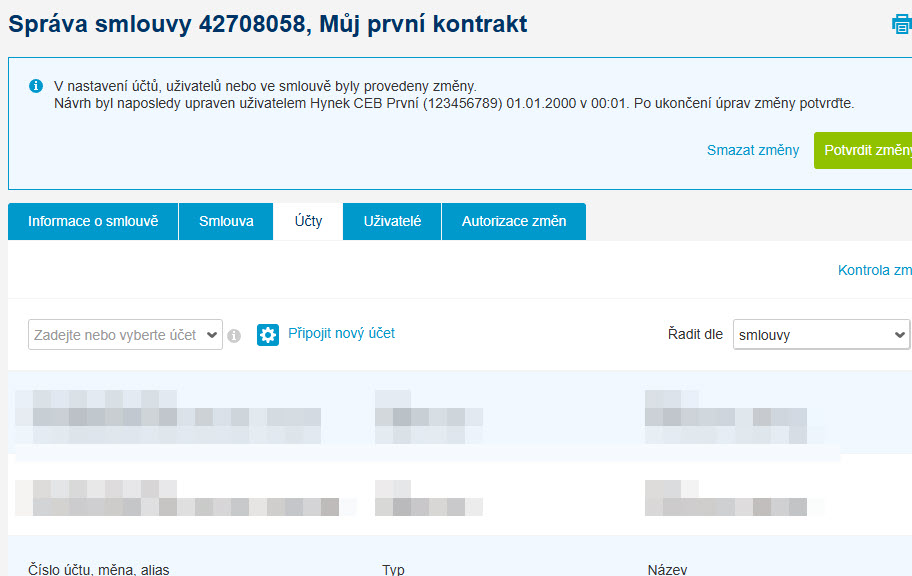
-
Check the changes in the documentation – and once everything is as desired, you can Authorize either by Smart key or chip card.
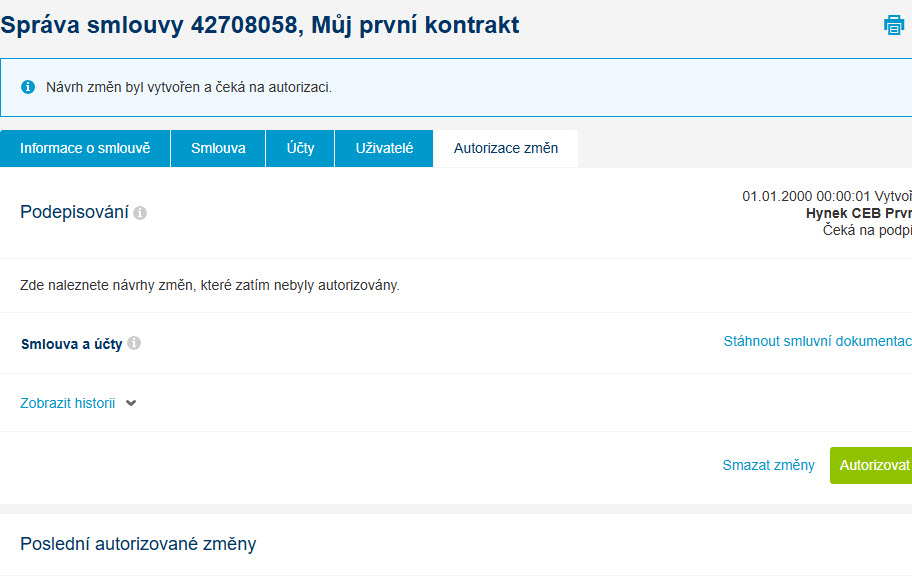
-
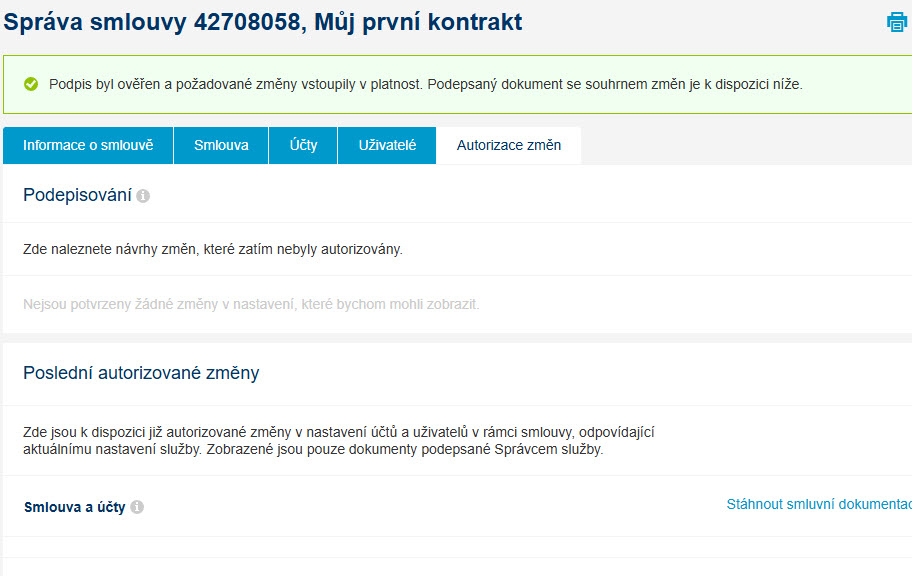
Should you be a single person to approve, it is done now. The validation of the signature took place – and payments from now on will be authorized as defined by new rules.
Changing payment card limit
-
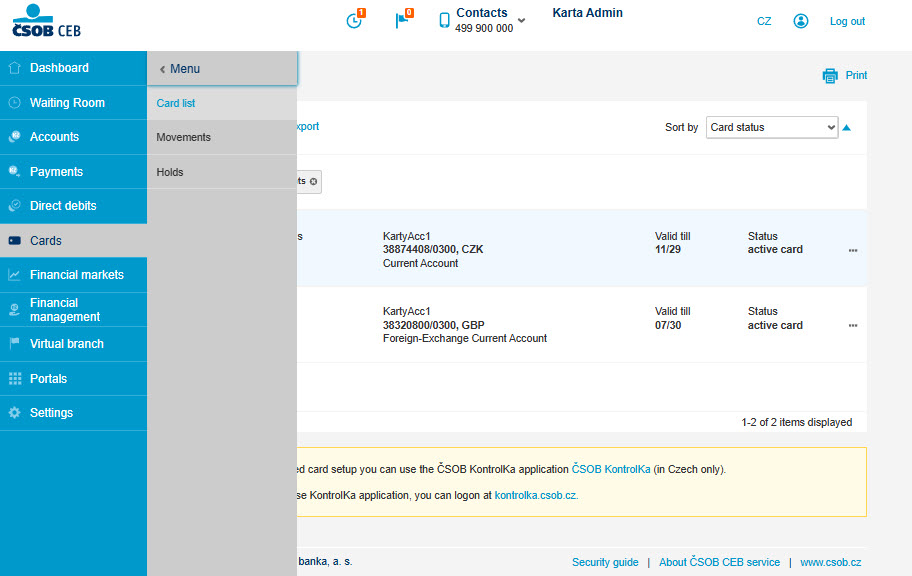
In the main CEB menu, select Cards, then choose Card list.
-
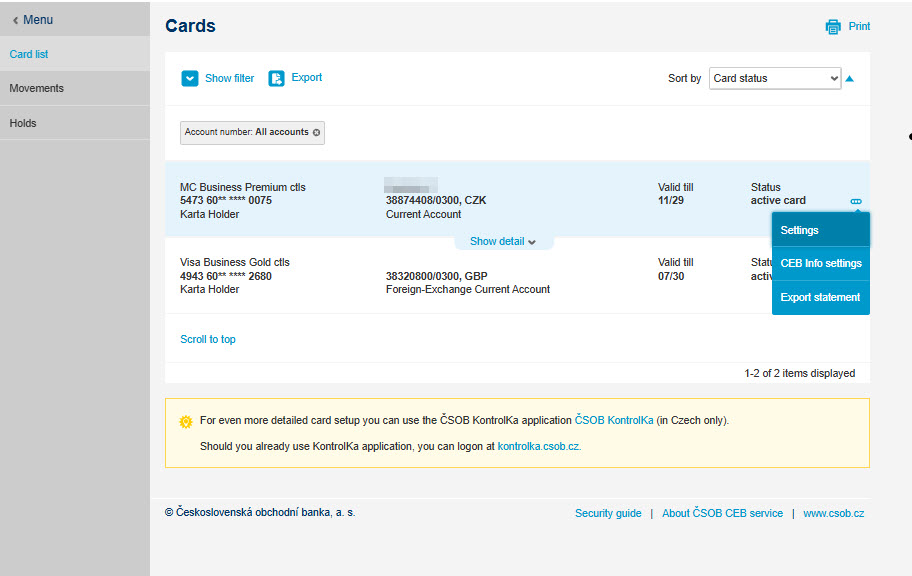
A list of your payment cards will appear. For each card, you can expand the Show Details to view the current settings. You can also change the limit more quickly — simply click the three dots next to the selected card and choose Settings.
-
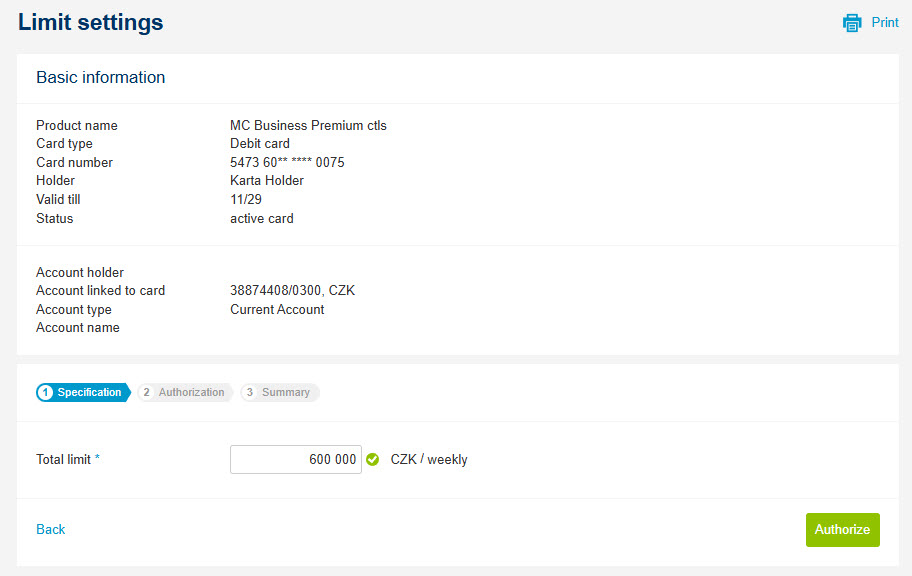
Enter the new limit and confirm the change by selecting Authorize.
-
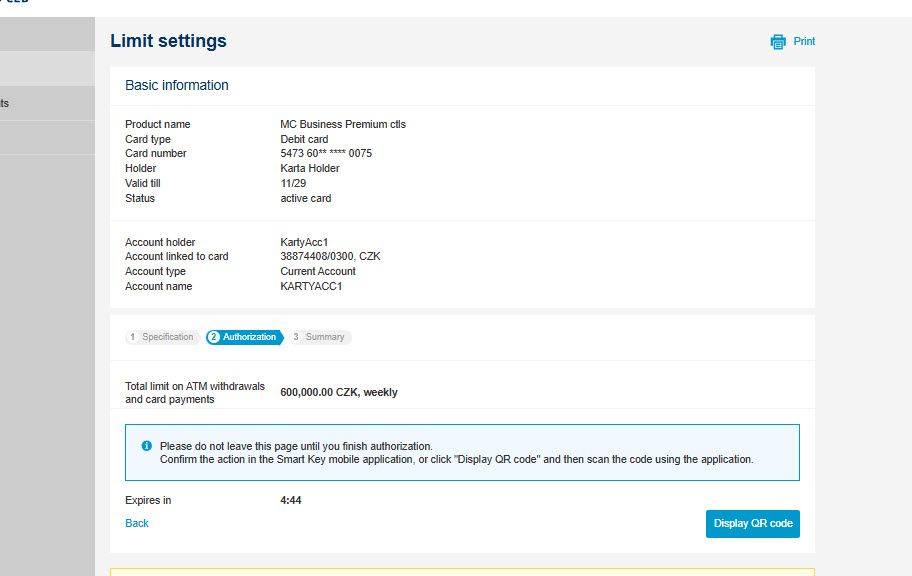
To complete the update, confirm the change in the Smart Key app.
-
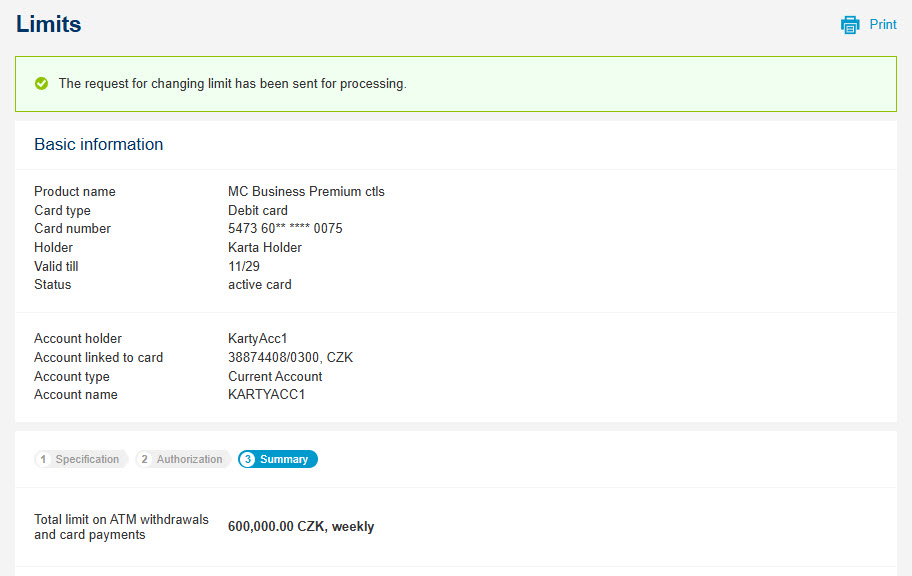
Done - your card limit has been successfully updated.
Payment confirmation
-
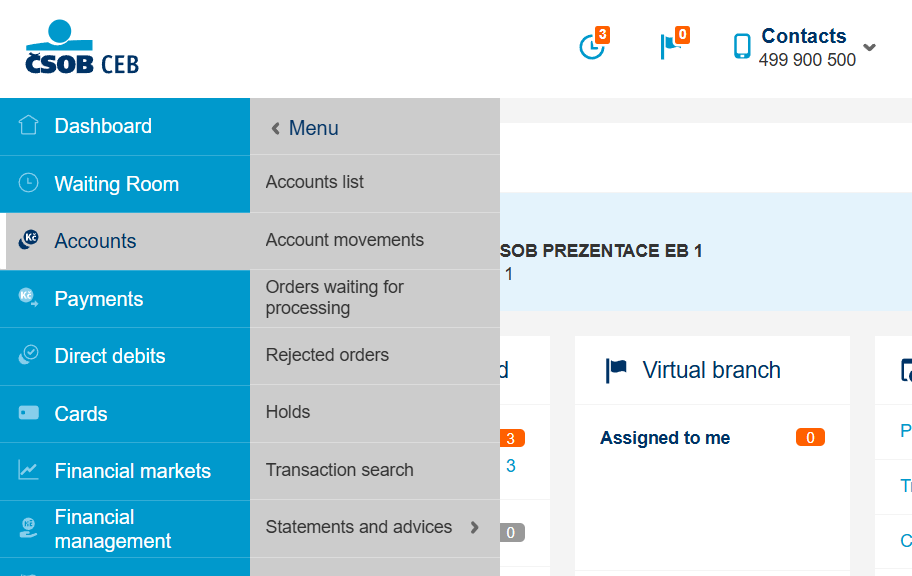
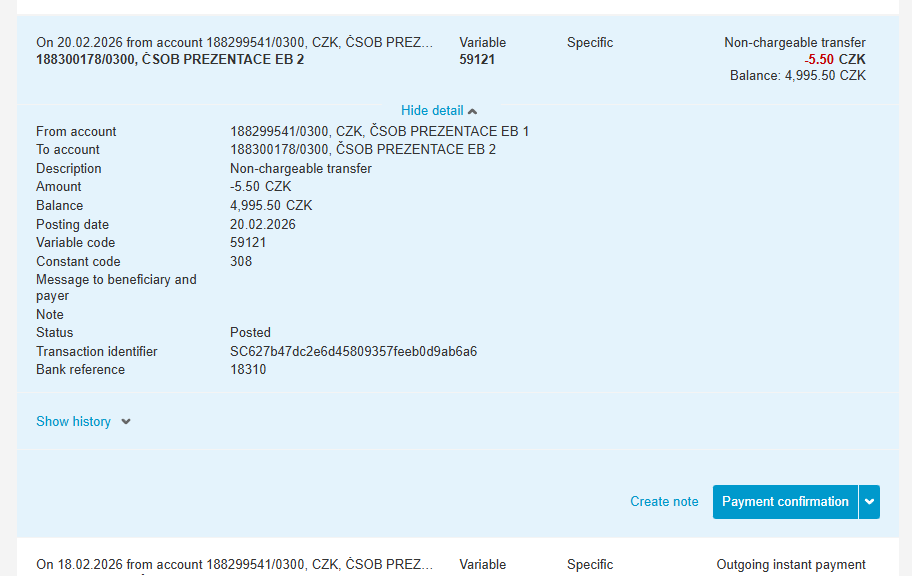
In the CEB service, you can easily download a Payment confirmation. You can view all movements on your accounts through the main menu under Accounts in the Account movements section.
-
After clicking on the selected account entry, you will see a button labeled Payment confirmation. By clicking this button, you generate a confirmation for that specific payment.
-
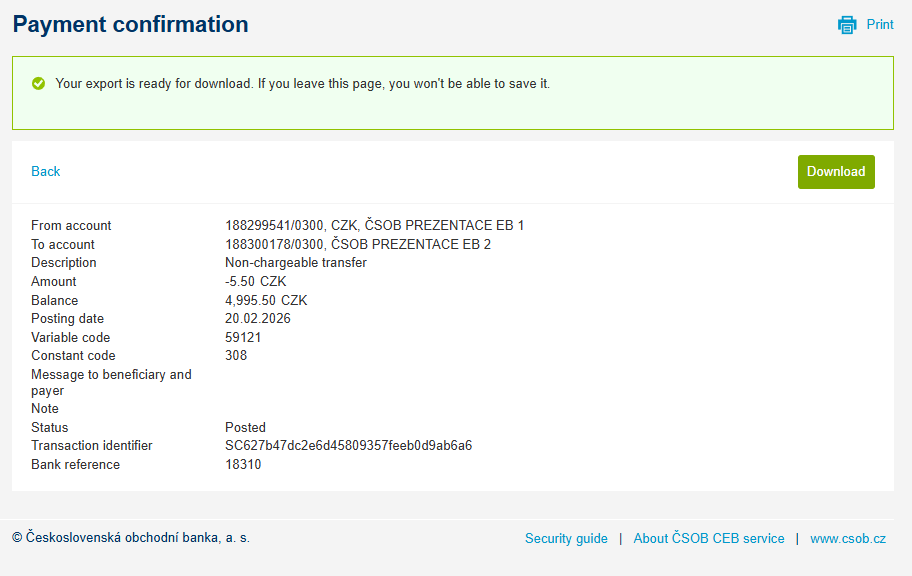
The payment confirmation, which we prepare for you in PDF format, can be downloaded to your device using the Download button.
Export of Payment Card Transaction Statement in ČSOB CEB
-
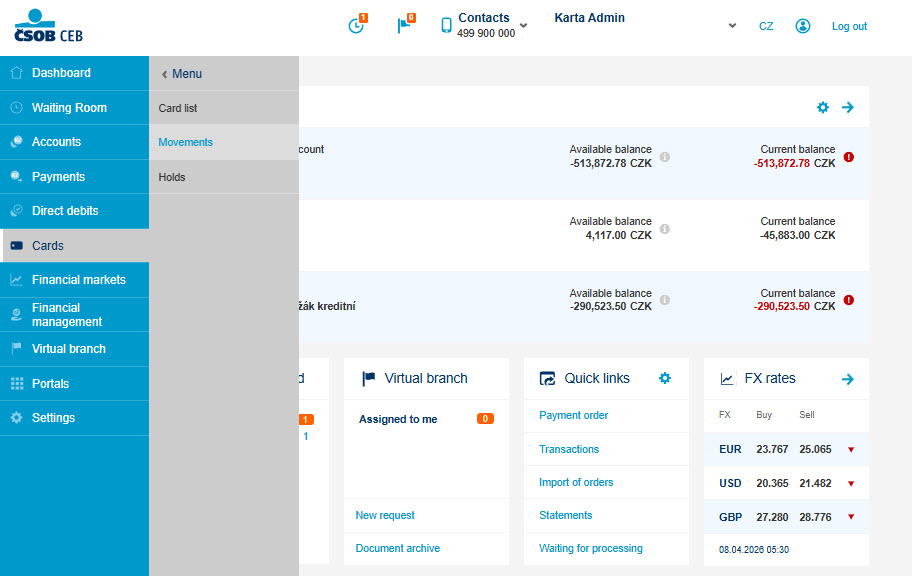
In ČSOB CEB service, you can easily export a statement of transactions and movements for a selected payment card. Select Cards from the CEB main menu and then open the Movements section.
-
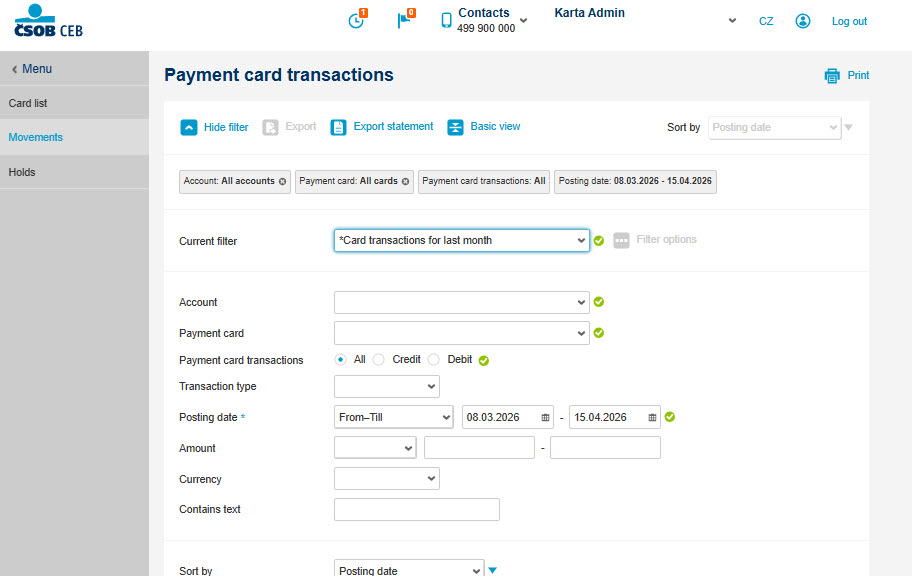
To search for a specific card transactions use filter. To get an overview of card transactions, click to the Export statement icon located above the main filter.
-
In the menu Export of statement define the required parameters: select the accounts and payment cards to be included in the export, specify the transaction date range, choose the desired export file format.
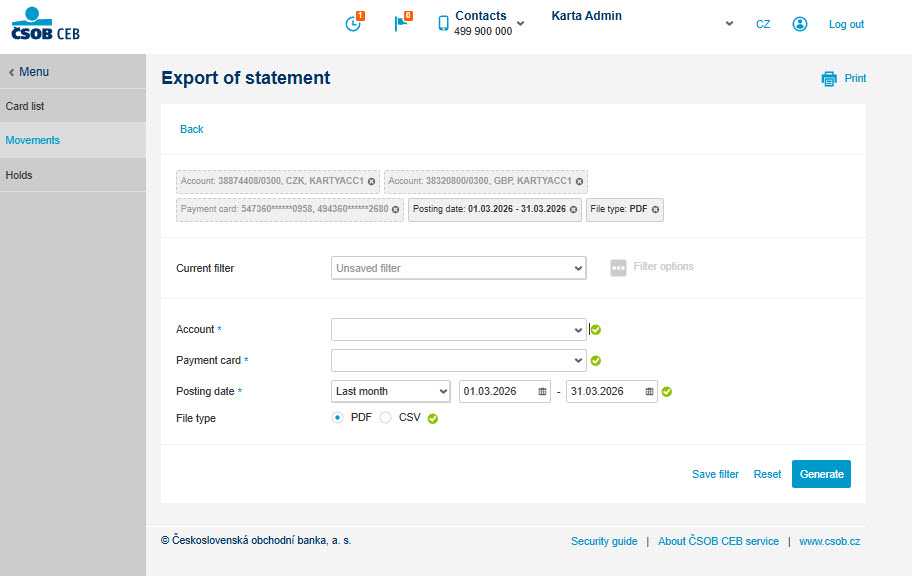
-
If you plan to use the configured filter repeatedly, it is recommended to save it using the Save Filter option.
Than continue using Generate to prepare the statement for download.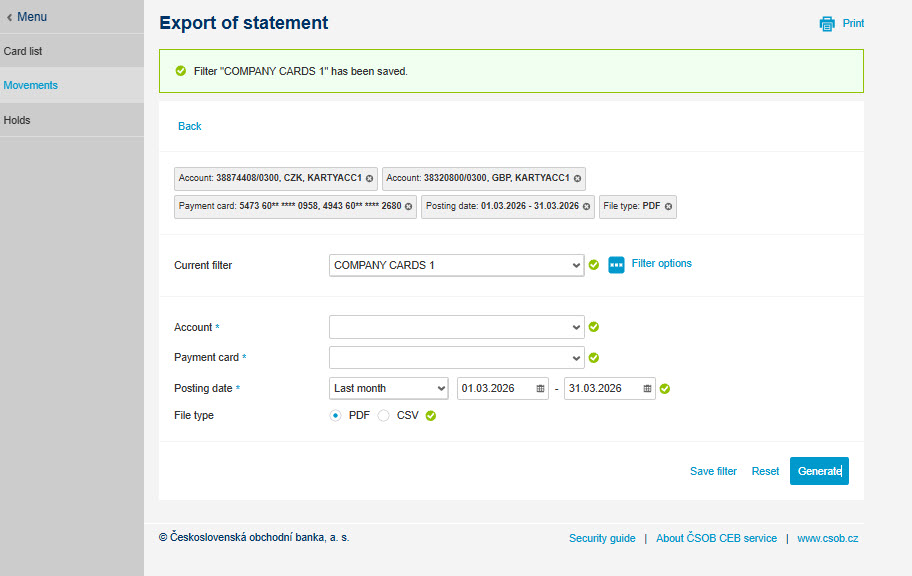
-
Once the output is generated, the statement is ready for download. Click Download and save the file to your device.
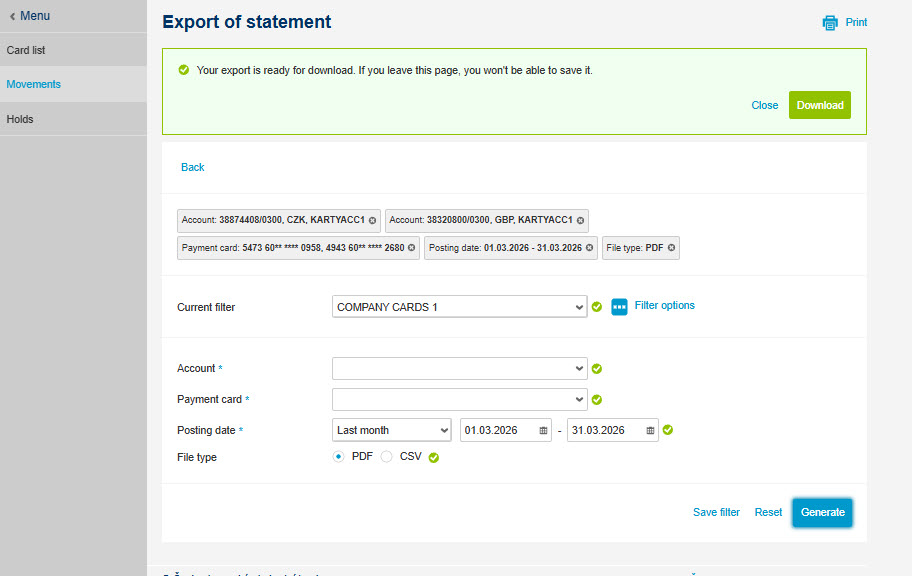
QR payment
-
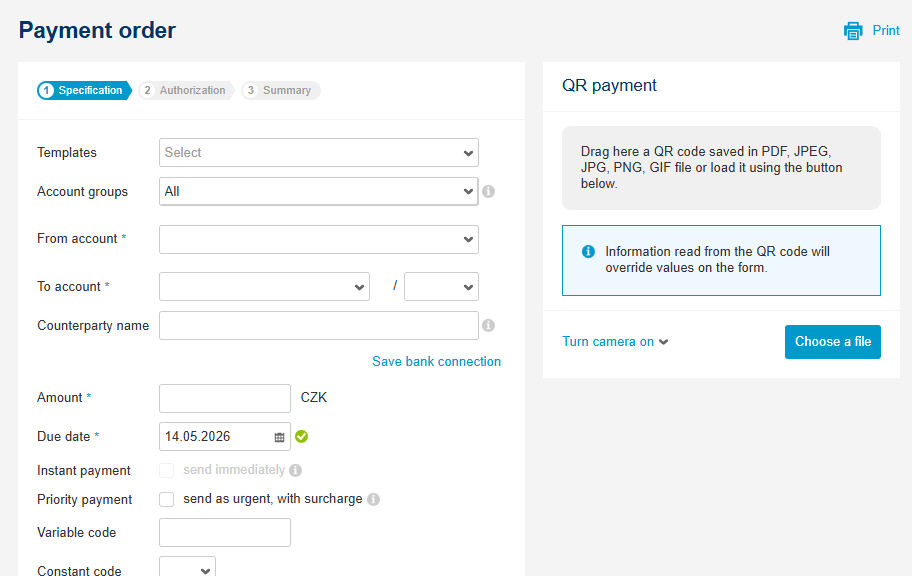
In the CEB portal, you can easily make a payment utilizing an QR code either in a file on your PC or printed on an invoice. The option to scan the code is available on the homepage or in the domestic or SEPA payments.
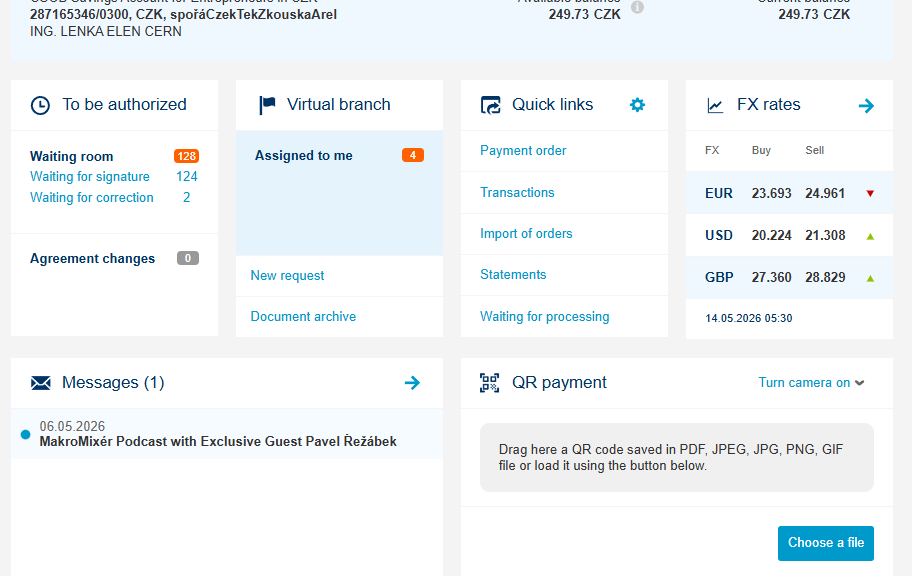
-
To upload a file from your device, use the Upload File button. If you have a printed QR code on an invoice, use the Turn on Camera button.
-
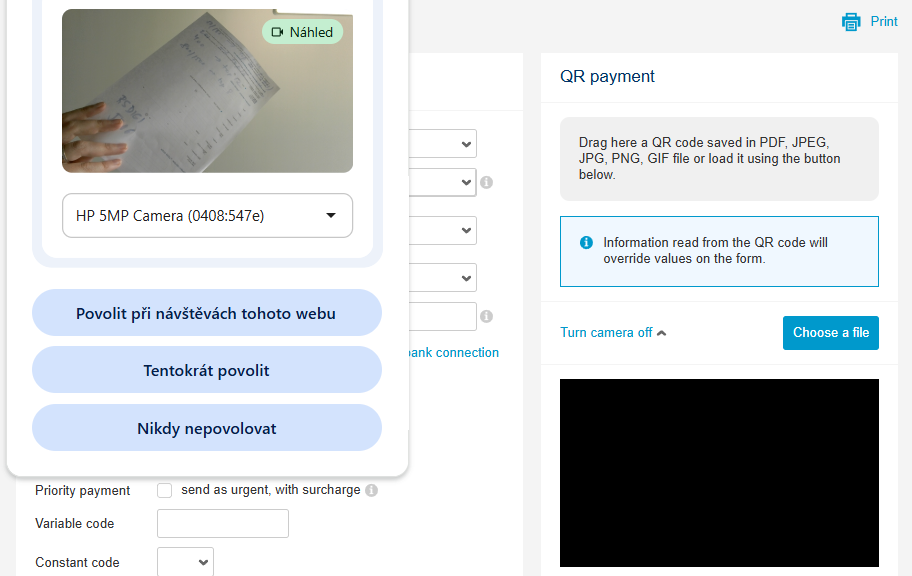
A system dialog may appear asking you to allow the use of your device’s camera. If you have multiple cameras connected, you can choose which one to use from the list.
-
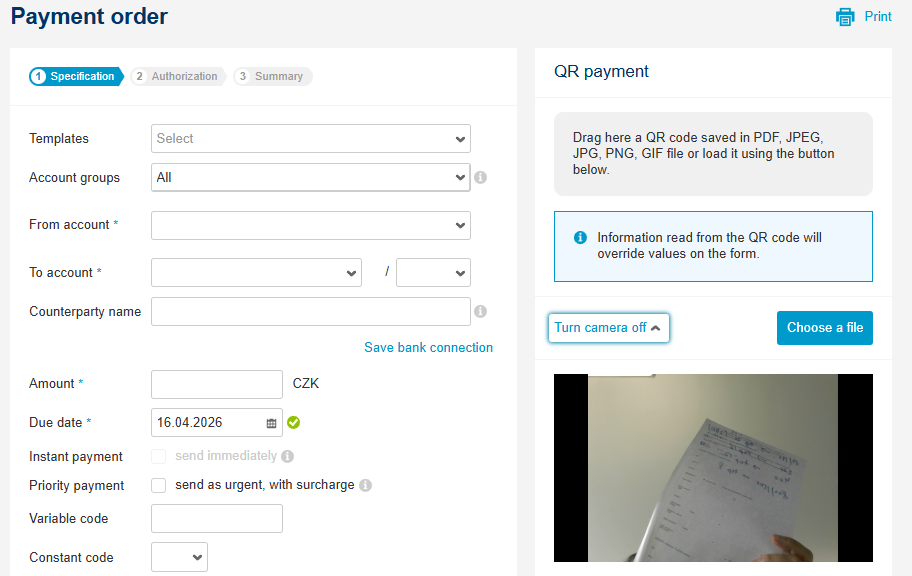
You will see a preview of your camera. Position the QR code within the camera’s field of view.
-
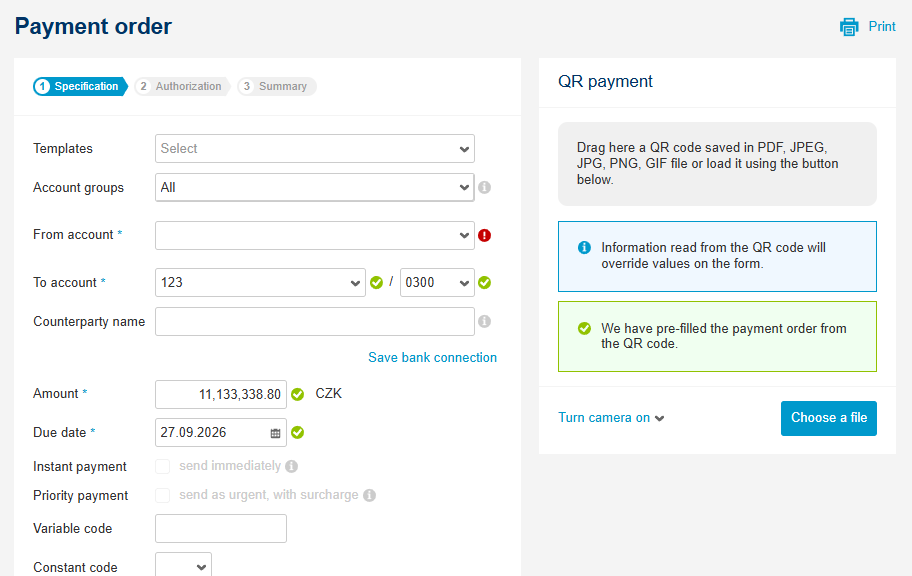
Once the data is successfully read, the form will be filled in and a confirmation message is shown. You can just check and authorize.

Zřízení ČSOB ID pomocí aplikace ČSOB Smart, včetně aktivace Smart klíče
Pokud potřebujete zřídit ČSOB Identitu bez nutnosti založení běžného účtu, začněte naskenováním zobrazeného QR kódu.
-
Fotoaparátem v mobilu naskenujte zobrazený QR kód, který vás přesměruje do obchodu Google Play nebo App Store přímo na aplikaci ČSOB Smart.
-
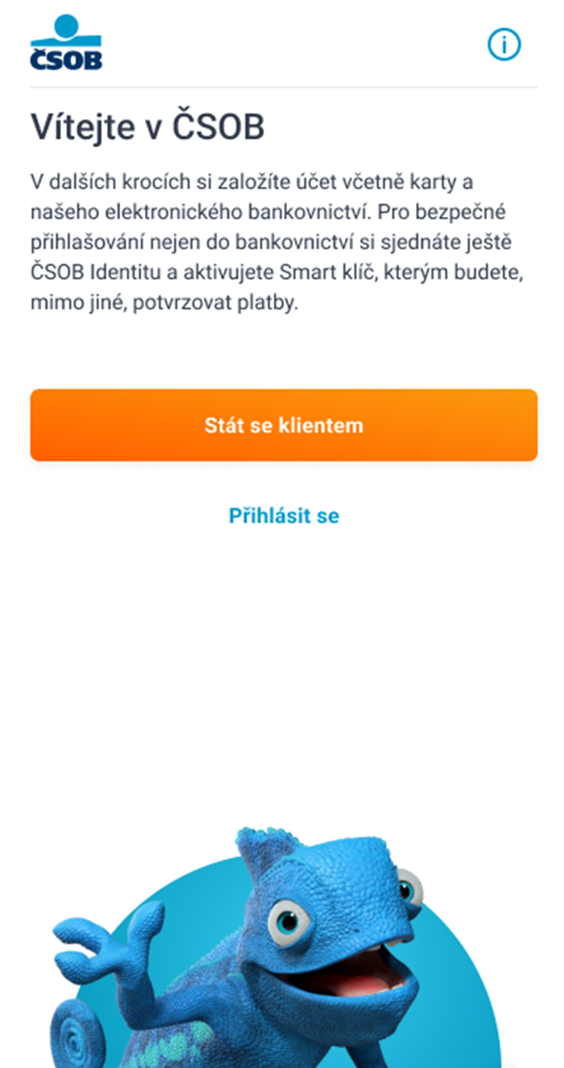
Na úvodní obrazovce Smart vyberte Stát se klientem.
-
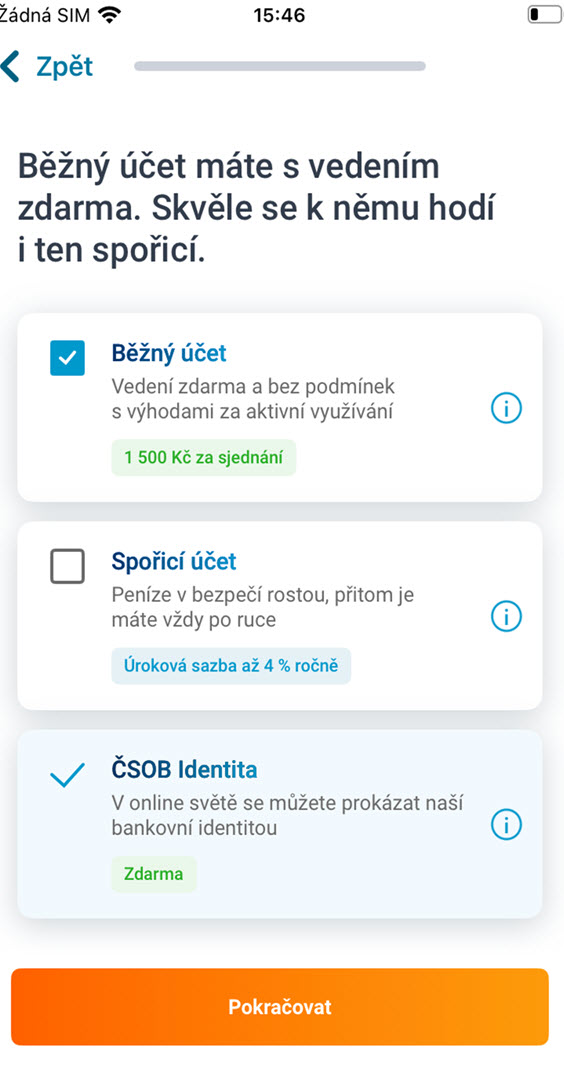
Na následující obrazovce můžete odebrat založení běžného účtu, založíte si tedy pouze ČSOB Identitu.
-
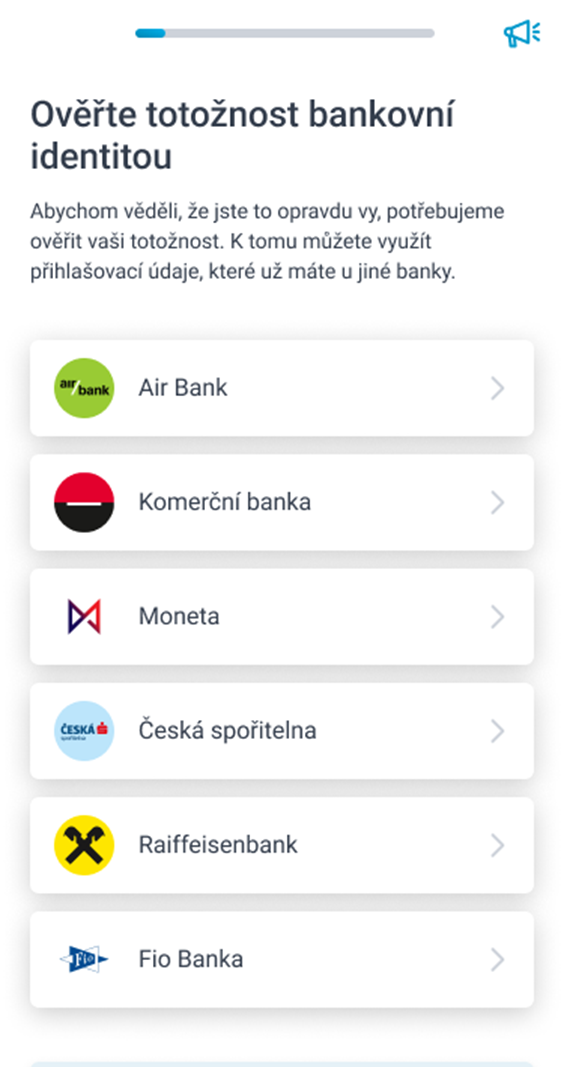
Vyberte banku, u které máte bankovní identitu. Přesměrujeme vás na přihlášení a potvrdíte předání údajů, po kterém vás přesměrujeme zpět k nám.
-
Zkontrolujte a doplňte své údaje.
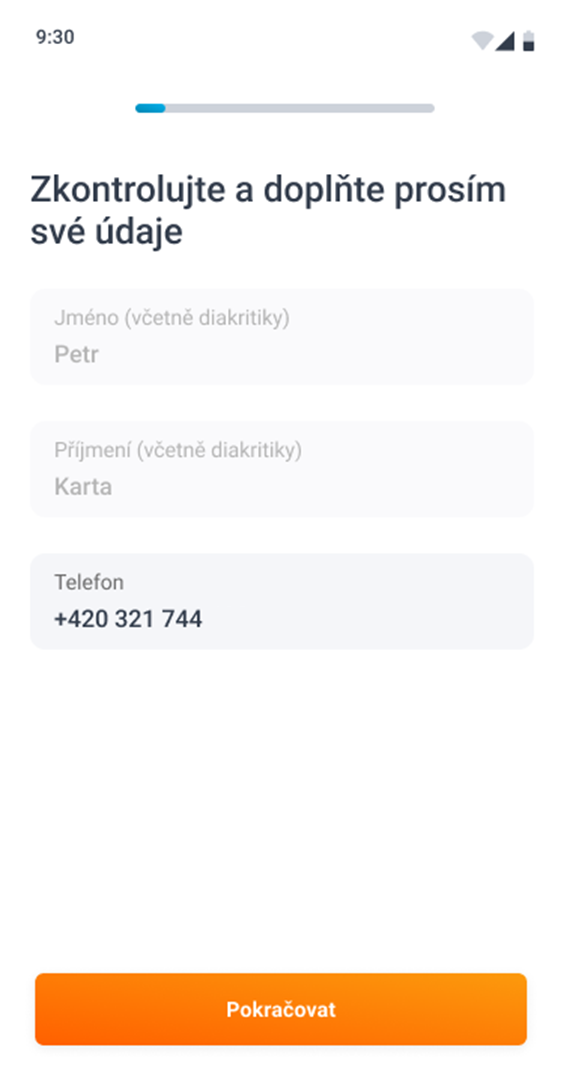
-
Zadejte e-mail, který bude sloužit jako vaše uživatelské jméno do ČSOB Identity.
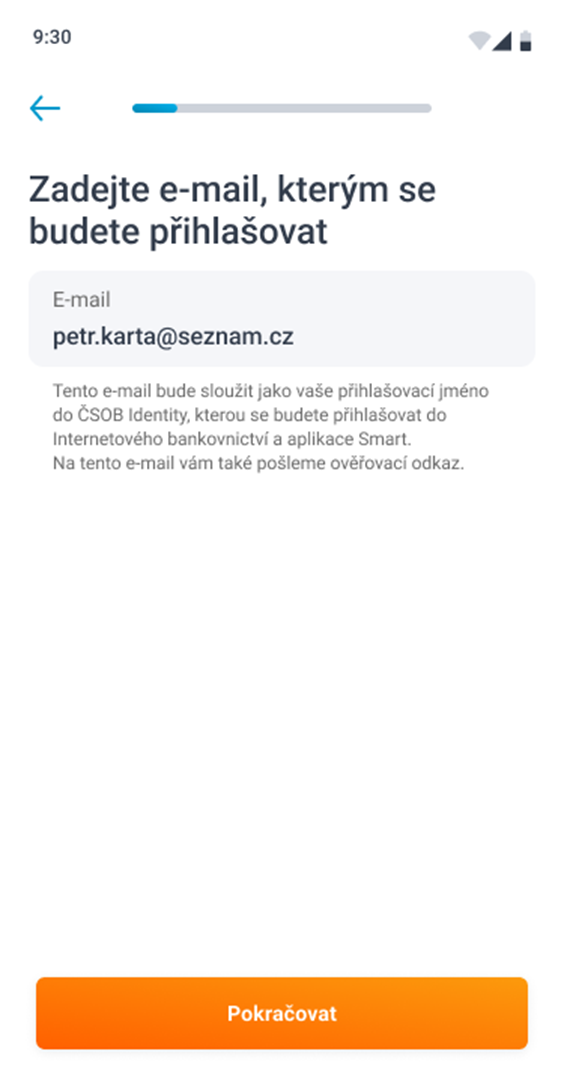
-
Zkontrolujte, že všechny body prohlášení platí, a zvolte Pokračovat.
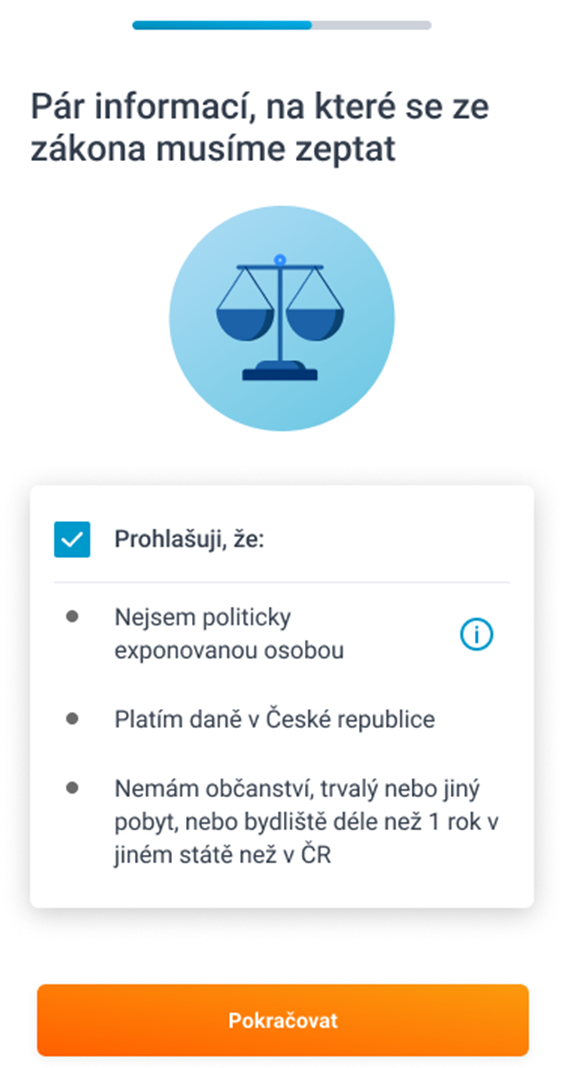
-
Vyberte zdroj příjmu a dejte Pokračovat.
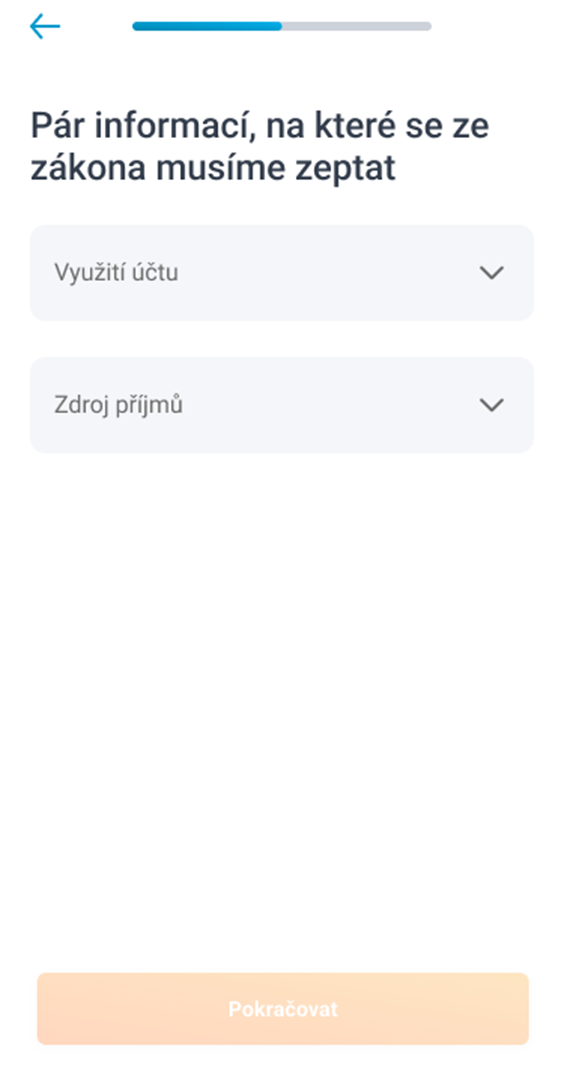
-
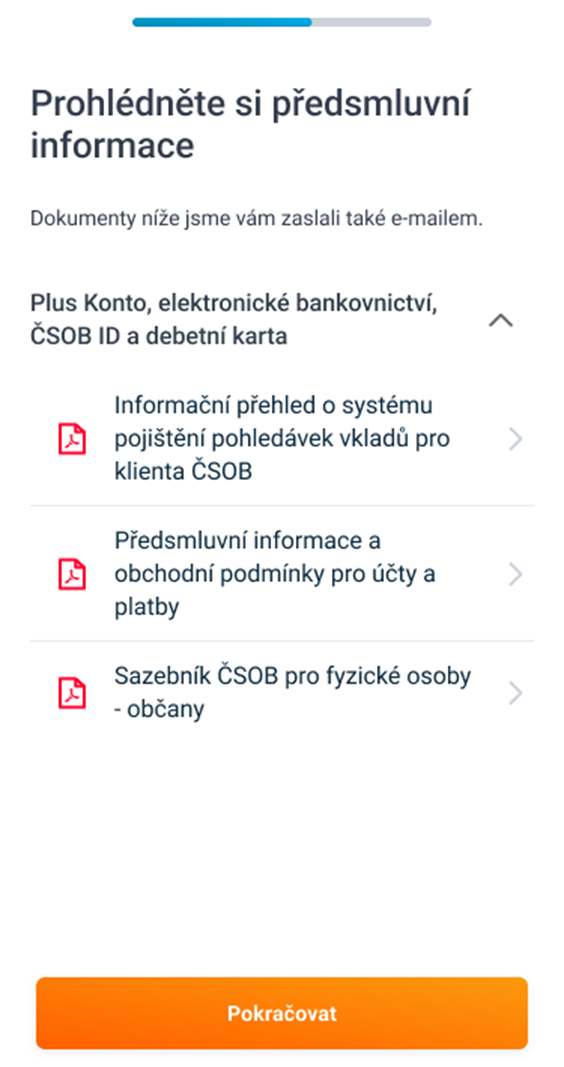
Projděte si předsmluvní informace.
-
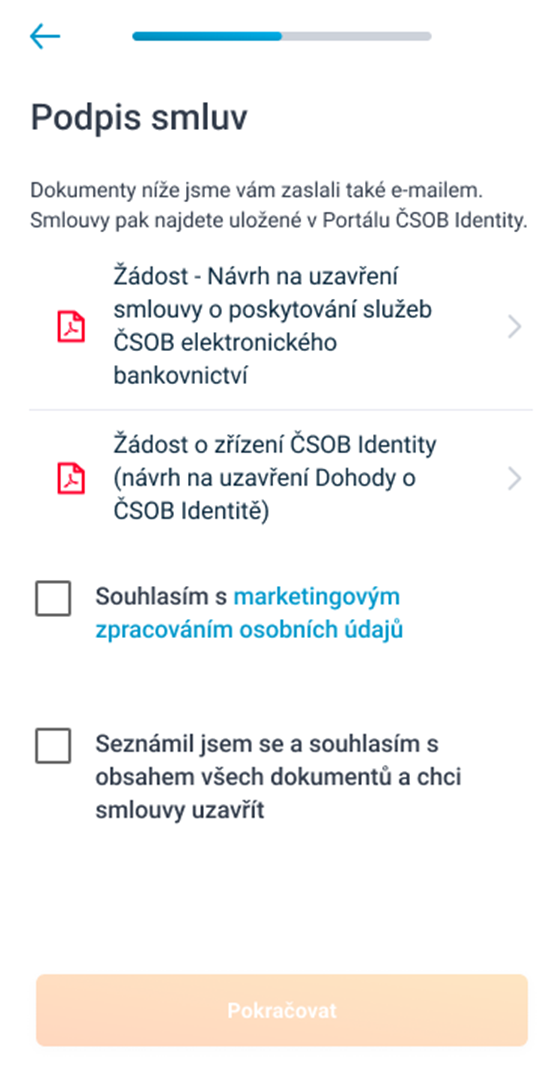
Poté, co se seznámíte s obsahem dokumentů a odsouhlasíte ho, zvolte Pokračovat.
-
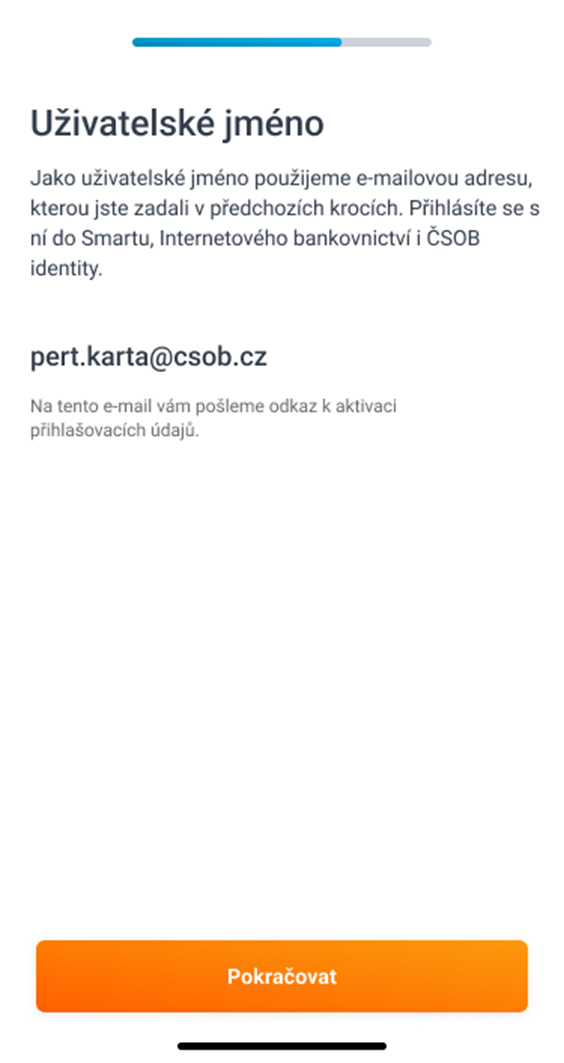
E-mailová adresa, kterou jste zadali v předchozích krocích, bude sloužit jako vaše uživatelské jméno do ČSOB Identity.
-
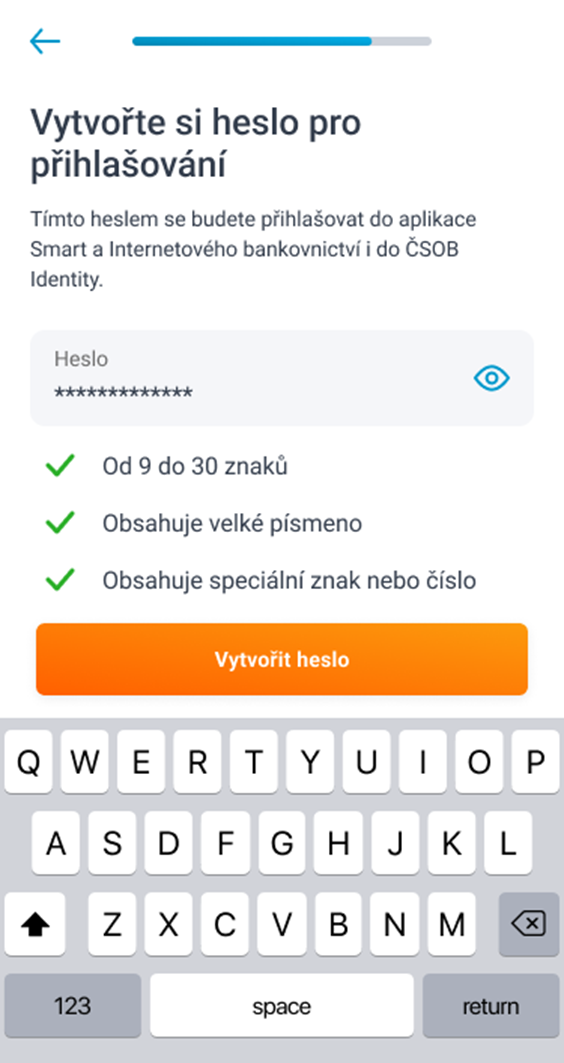
Nastavte si heslo, které v dalším kroku zopakujete, a zvolte Vytvořit heslo.
-
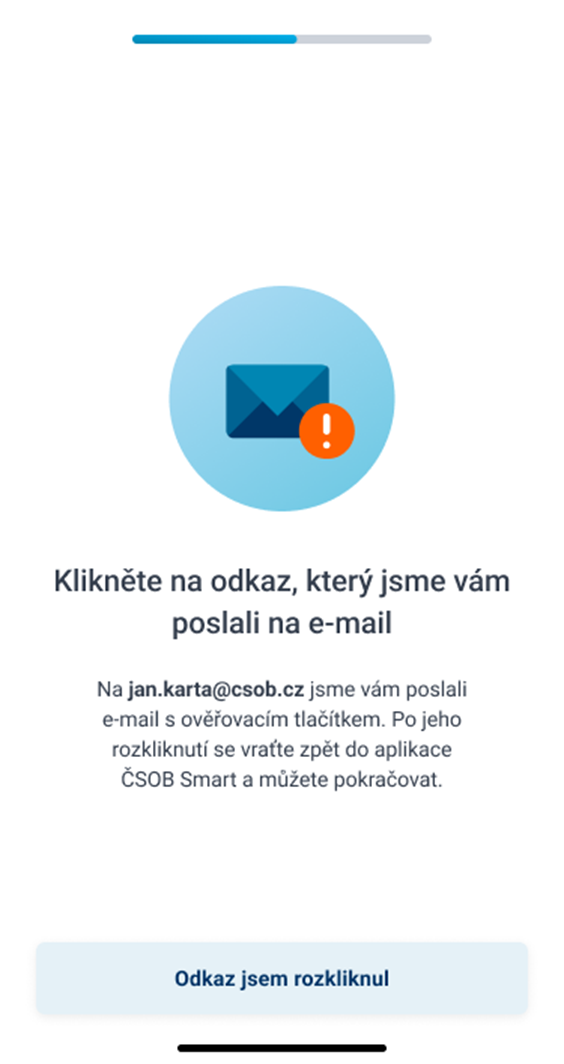
Klikněte na odkaz, který jsme vám poslali na e-mail.
-
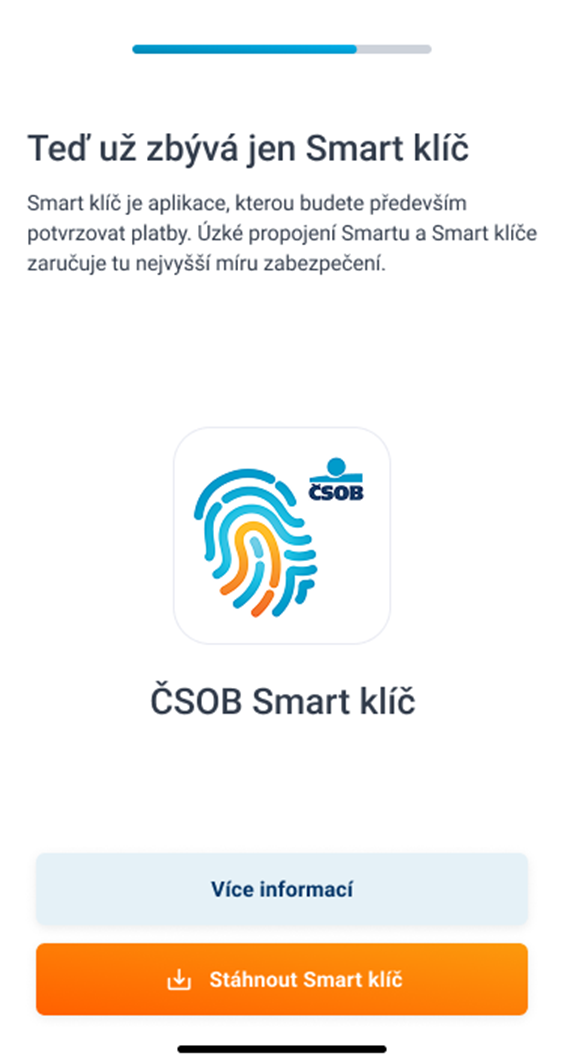
Stáhněte si ČSOB Smart klíč ze svého obchodu s aplikacemi a po jeho stažení se vraťte do ČSOB Smart.
-
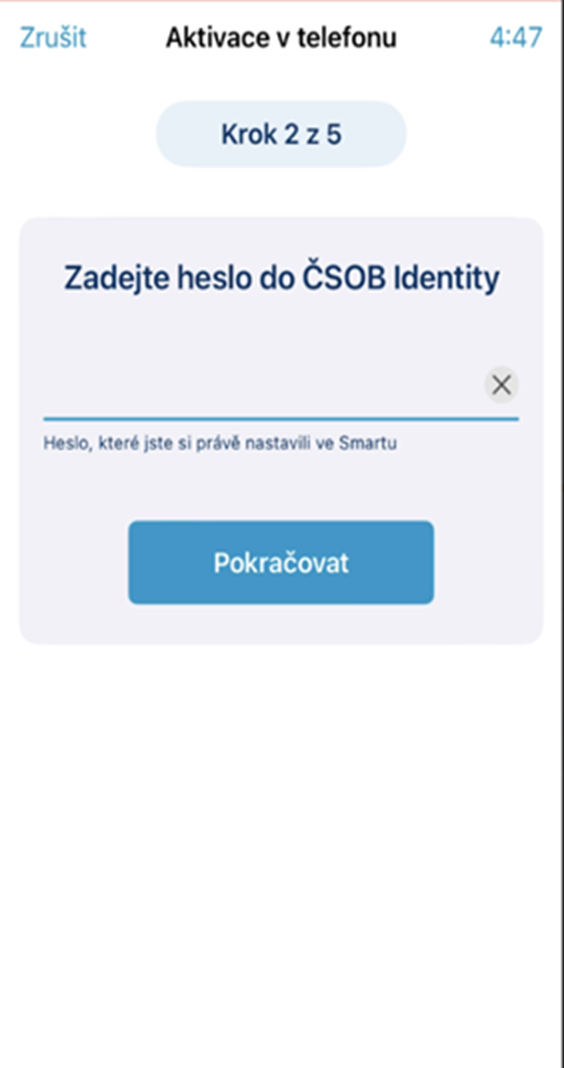
Zadejte heslo do ČSOB Identity, které jste si před chvílí zvolili.
-
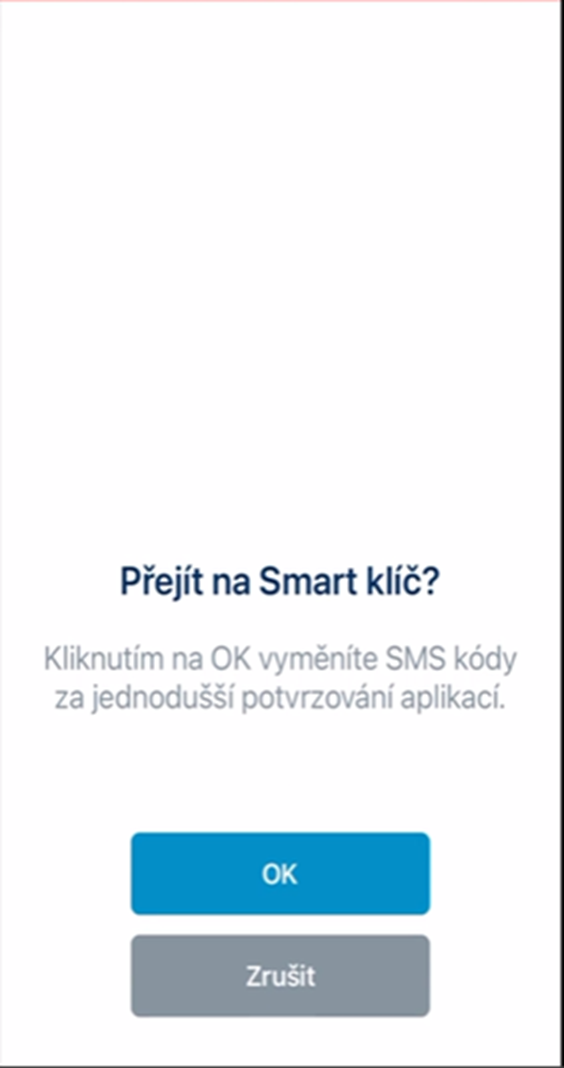
Potvrzením OK přejdete na potvrzování transakcí pomocí Smart klíče.
-
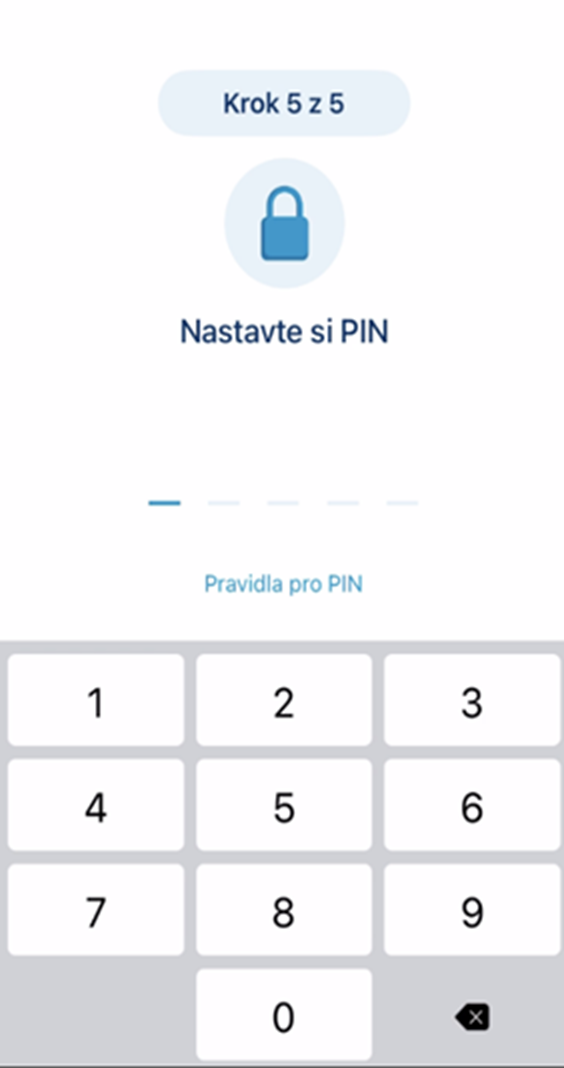
Nastavíte si PIN ke Smart klíči, který v dalším kroku zopakujete.
-
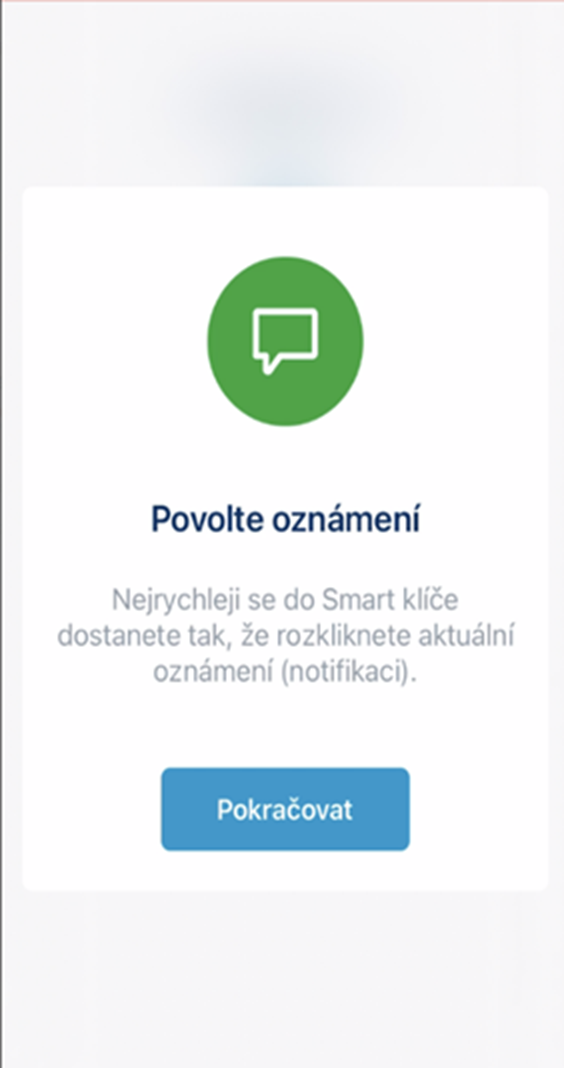
Povolíte oznámení pro aplikaci Smart klíč a je hotovo.